Content creation

Courses


Introduction

1. The "Events" module is designed for planning, organizing, and tracking educational activities. For example, attending a conference, in-person training, meeting with a mentor, etc.

2. Main features of the module:

  • Creating events, sending invitations to participants.
  • Call for participation applications, confirmation of participation, monitoring of participant numbers.
  • Collection of feedback forms following the event.

3. In the application settings (Settings - Others), you can hide Catalog. However, it will still remain accessible to the application moderators.

4. Activities can be added to the Program. In this case, Event will be located in the Programs.

Creating an event

1. There are two possible ways to create an event:

  • Moderator.
  • By the user via a request. After the request is confirmed by a moderator, Event will be created.

2. ModeratorTo create an event, click the "Add" button A card for creating an event will open.

Event Creation Card, containing the following fields and elements:

image.png - event name input field

image.png - Start and end of the event

image.png - type (internal, external) and event type. An exhaustive list of development events is provided; if anything is missing from the reference, please write to us, we will add it.

image.png - event description.

image.png - event organizer.

image.png - responsible for Event.

image.png - Participants. The list of participants is created by the moderator. The list also includes employees who independently submitted an application and were approved by the moderator. The field - number of participants allows setting a participant limit. If the limit is exceeded, an employee submitting an application will receive a notification that the participant limit has been exceeded.

image.png - setting up colors for events and activities.

image.png - send invitations and the invitation text.

image.png - By Default is active. A feedback form configured for events is displayed.

On the right is the Section for coordinating submitted applications. All applications that employees submit to participate in the event will be displayed in this section:

3. UserFrom the personal account, you can create a request for a new Event via the element 

image.png 

When clicked, a simple event creation request form will open.

The application will be sent to moderators, and after their approval Event will appear in the general catalog of events.

Participation in the event, Event in the Personal Account, in the calendar

1. To participate in the event, the employee selects Event from the Event Catalog and submits the application by clicking the element. 

2. After confirmation by the moderator (the moderator has edit mode, with a list of applicants on the right), the employee will be added to the list of participants.

3. After moderator approval, the event will appear in the employee's personal account and calendar (for Bitrix 24).

Event Reports

1. Based on the results of participation in events, you can generate a report in the Reports section under Events: external, in-person.

2. If a feedback form was added to the event, reports can be generated based on the feedback forms.

Event Statuses

Events have the following statuses:

  • Published.
  • Not published.

5. Lesson Creation

5.1. Introduction

1. Lesson - this is an educational module from which are assembled courses I programs.

Lesson can only be part of a course or program. If Course consists of a single lesson, create Lesson, then add it to Course.  

2. Lessons can be in the following formats (only one option):

  • Video tutorial (pre-loaded into YoutubeVimeoVK VideoRutube or any other video hosting platform);

  • SCORM;

  • pdf (for example, presentations, instructions, and other materials in PDF format);

  • MS Office (Word documents, Excel, PowerPoint);
  • Longread. Longread can consist of a single element or can combine all these formats:

    • video,

    • audio,

    • image,

    • text.

  • cforj - proprietary content constructor. Allows adding over 10 interactive elements.
  • h5p is a popular worldwide constructor. It allows adding over 50 interactive elements. 

For example, if you need to create an audio course: 

  • create Lesson in longread format, 
  • In Longread add an audio file, 
  • based on the lesson create Course.

3. You can add an unlimited number of additional materials and links to the lesson. 

Section with lessons and Catalog lessons are available only to the application moderator.

5.2. Adding a Lesson

1. Basic Information and Formatting

At the first stage, the moderator sets the visual and textual identifiers of the lesson:

  • Lesson TitleRequired field for entering the title of the training module.
  • DescriptionField for entering a brief lesson annotation that reveals its essence to the learner.
  • Lesson CoverAbility to select an image from the media library. The system recommends using files with aspect ratio of 16:9 for correct display in the interface.

2. Classification and Gamification

In this block, the lesson's position within the system and its value are configured.

  • Section catalogChoice thematic category from the dropdown list for convenient lesson search in the general catalog.
  • GamificationSetting up rewards for successful module completion. The moderator specifies the quantity. XP pointsthat the employee will receive.

3. Lesson Content and Resources

This Section is responsible for the technical implementation of training:

  • Main Material.
  • Additional filesAbility to attach related documents from the system's materials library for download by learners.
  • Additional linksTool for adding external resources. The moderator specifies the link title and its URL by clicking a button. «+» to add new items.

4. Shutdown

At the bottom of the interface are the process control buttons:

  • SaveSaving a draft for further editing.
  • PublishFinal Action, after which Lesson becomes available in the system.
  • CloseExit creation mode without saving recent changes.

5. Types of content that can be uploaded or created

In the LMS, you can upload content created outside the LMS or create content within the LMS.

The following material types are used for loading ready-made content:

  • Video
  • SCORM
  • PDF
  • Office

The following tools are used to create content within the LMS:

  • Longread
  • cfroj
  • H5P

5.1. Video Lesson

Instructions for Adding Videos to Brusnika.LMS

The system allows integrating video content from any video hosting platform into the field. "Video link".

1. Methods of adding content

  • Direct linkssupported for YouTube, Vimeo, VK Video и RuTubeSimply copy the URL from your browser's address bar and paste it into the system.
  • Iframe codeis used for all other video hosting platforms or specific player settings.

2. How to get the iframe code

If direct import is not supported, perform the following steps:

  1. Open the page with the desired video.
  2. Press the button "Share" (Share) or the "..." icon below the player.
  3. Select an item "Embed" (Embed) or "Export".
  4. Полностью скопируйте предложенный код (он начинается с тега <iframe... and it ends </iframe>).
  5. Paste the copied code into the field "Video link" In the lesson editor.

3. Security and Privacy

To protect corporate content, it is recommended to use Private access mode on video hosting platforms:

  • Upload the video to the hosting platform and select the access option in the settings. "Access via link" or "Private video".
  • When such a video is published in the LMS, it will be available only to your employees within the training module.
  • External users will not be able to find this content through the hosting platform's search or see it in your public profile.

SovietWhen creating a video lesson, it is also recommended to upload cover with a 16:9 aspect ratioso that Material looks aesthetically pleasing in the general catalog.

5.2. Lesson in the SCORM standard

Brusnika.LMS supports все стандарты SCORM (including 1.2 and 2004). The "Lesson Content" block for this material type has the following settings:

  • Loading packageArea for selecting or dragging an archive with a training module in .zip.
  • Configuration of passageAn important element is the checkbox. "Consider statuses from the SCORM package"Upon its activation, the system will automatically receive completion data and grades directly from the package's own logic. This is necessary for the correct display of progress and points in the user's personal account.

5.3. Lesson in PDF format

To load the main content, the Block "Lesson Content" is used:

  • Working with the librarywhen the button is pressed "Select from library" The "Media Library" window opens.
  • Loading and Choice:
    • In the media library, you can select an existing PDF file in the system by clicking the button. "Select" under the document card.
    • If the required file is not available, the moderator can upload a new document from the computer by clicking the red button. "Upload" in the upper left corner of the media library window.
    • Search by filename is available for quick navigation among uploaded files.

After selecting a file, the system displays it in the content block:

  • View InterfaceThe moderator can preview the document with the ability to navigate through pages, change the zoom level, and use full-screen mode. Next to the file name, a trash can icon is displayed for deleting or replacing the file.

5.3. Lesson in MS Office format

To load the main content, use Block "Lesson Content". Documents of the following formats can be loaded: Word, Excel, Powerpoint

  • Working with the librarywhen the button is pressed "Select from library" The "Media Library" window opens.
  • Loading and Choice:
    • In the media library, you can select an existing file in the system by clicking the button. "Select" under the document card.
    • If the required file is not available, the moderator can upload a new document from the computer by clicking the red button. "Upload" in the upper left corner of the media library window.
    • Search by filename is available for quick navigation among uploaded files.

5.4. Lesson in Longread Format

Editor's functional capabilities:
  • Text formattingChoice paragraph styles, font formatting (bold, italic), text alignment, and creating bulleted or numbered lists..
  • Insertion Tools (Insert Menu)enriches the text with additional elements:
    • ImageInserting illustrations into the body of the article.
    • Link (Ctrl+K)adding hyperlinks to external resources.
    • Multimediaembedding video or audio content.
    • TableCreating structured data.
    • Horizontal linefor visual separation of logical blocks in a longread.
  • Additional toolsWorking with text and background colors, clearing formatting, and accessing help.

5.5. Lesson in cforj format

Section "Creating a Lesson - Cforj" (Course Forge Studio) is a powerful interactive builder integrated into the Brusnika.LMS system. This format allows for assembling complex educational modules from various components, configuring transition logic, and utilizing artificial intelligence capabilities for content generation.

Interface and Navigation of the Constructor

The Cforj workspace is divided into several zones:

  • Screen and Module PanelLocated on the left side, it allows you to create a lesson structure consisting of individual Screens and logical Modules.
  • Top control panelDisplays the "Quick Start" steps (Add Screen → Components → Configure Logic → Settings → Export) and status information for AI action tokens.
  • "Add Component" buttonOpens a menu for selecting elements, divided into four main categories: Content, Quiz, Interactive, and Simulation.

Description of element types

1. CATEGORY CONTENT (Content Elements)

Designed for delivering core educational content:

  • TextA full-featured editor with support for visual mode and HTML code. Allows font formatting, creating lists, tables, and using special callouts (Tip, Info, Attention, Danger, Success) for visual accents.
  • ImageGraphics insertion element. You can upload a file from your computer or insert via a URL link, add alternative text and a caption.
  • Video player supporting direct file uploads or integration of links from YouTube and other platforms. A moderator can configure the system's action logic immediately after video playback ends.
  • ButtonInteractive element for navigation. Configured with a label (button text), visual variant (Primary or Secondary), and logic on press (e.g., moving to the next screen).

2. QUIZ Category (Verification Elements)

Used for creating intermediate tests within a lesson:

  • Single ChoiceA single-choice question. The moderator marks the correct option, can add an explanation that the student will see after answering, and can configure different logic for correct and incorrect results.
  • Multiple ChoiceSimilar to the selection mechanism, but allows marking multiple correct answers.
  • True / FalseDouble Choice for evaluating any statement with consequence logic tuning.
  • MatchingTask for matching pairs of elements from the left and right columns. Supports feedback configuration for correct and incorrect attempts.
  • Sequence (Sequence)Requires arranging the elements in the correct order. In the editor, the elements are set correctly, but for the student, they will be shuffled.
  • Fill in the BlankText with gaps. The editor uses the tag {{blank}}, and below are the correct answers and possible alternatives for each blank.

3. INTERACTIVE Category (Interactive Elements)

Elements for actively engaging users in the learning process:

  • ChecklistList of tasks or items for user to check off.
  • CardsFlip cards or flashcards.
  • BranchingCreating scenarios where the learning path depends on the user's choice.
  • Drag and dropMechanics of Drag-and-Drop Elements to Specified Targets.
  • Points of InterestClickable areas on a static image for calling up additional information.

4. SIMULATION Category

  • Dialogue TrainerInteractive dialogue simulation for practicing communication skills.
  • Interface SimulationStep-by-step interactive tutorial for learning how to work in a specific program or system.

Completion and Export

The constructor allows you to instantly see the result via a button. "Preview"The ready-to-use interactive Lesson can be immediately loaded into the Catalog of lessons or exported to various formats: JSON, SCORM 1.2/2004, xAPI (Tin Can), HTML, Excel or embed on a third-party website via iframe.

5.6. Lesson in H5P format

Section "Creating a Lesson - H5P" In the moderator's office, it allows for the integration of interactive content created using the open-source H5P authoring tool into the system. Over 50 types of interactive content are available.

Since the H5P format offers extensive functionality, for an in-depth exploration of all the constructor's capabilities and content creation tools, please utilize official training materials: 👉 Official H5P Tutorials for Authors

5.3. Lesson Actions

1. Lesson is possible editdeleteexport or create a copy

2. After creating a copy of Lesson, it is created with the same name and the word "Copy" before the name. Lesson is created in the Draft status.

3. The lesson export feature is used for cases when it is necessary Lesson to save or transfer from one portal to another. Lesson can be exported in Excel format (text content only) or UDATA format (all lesson content). The export format is configured in Settings - Application Settings - Other - Export Format.

5.4. Lesson Statuses

Lessons have statuses:

  • Status publicationspublished; draft (saved without publishing).
  • Statuses success ratesPassed; Not Passed. Passed - Finish button is pressed. Not Passed - Finish button is not pressed. 

Until the Complete button in the lesson is pressed, Lesson will be displayed in the system as Not Passed.

6. Material Creation

6.1. Introduction

1. Knowledge base materials are used for training processes and document familiarization.

2. General Structure of the Knowledge Base:

  • Shelves - materials are added to shelves. Shelves are not a mandatory component, meaning materials can be added without shelves.

3. The following types of materials can be created in the knowledge base:

  • Materials displayed on the screen:
    • PDF files;
    • Longread (combination of text, audio, video, images);
    • Media resource (video, audio);
    • SCORM package;
    • cforj;
    • H5P.
  • Materials downloaded to the user's device:
    • Files (any files);
  • Links.

4. The module includes a built-in material approval mechanism. If necessary, it can be activated to publish approved materials. However, this is not a mandatory step; materials can be published immediately without approval.

6.2. Creating a Shelf

1. Adding a shelf is done in Section In Catalogs - Knowledge Base. Click on the Add shelf element.

2. In the opened window, add:

  • Picture of the shelf.
  • Shelf name (required field).
  • Description.
  • Category.
  • Competency (targeted for development by the shelf materials).
  • Enable comments. Users will be able to write comments on the shelf.
  • Display the feedback form. After reviewing the regiment materials, the user will be presented with a feedback form. 
  • Points. Participates in the calculation of the total points of the gamification system.
  • Hide in catalog. The shelf will be hidden in the catalog. However, when materials are assigned to the shelf, they will be available in the My Materials section.
  • Hide from extranet. The shelf will not be available to extranet users.
  • For units only. Shelf visibility can be restricted to specific units.

3. To publish the shelf, activate the slider Publish and click Save.

6.3. Material Creation

1. Content Stage

At this step, the moderator determines the form and content of the future material.

  • Basic informationare being entered Title I Description (brief annotation of what this Material is about).
  • Coverability to upload an image for visual material identification in the catalog.
  • Material type: система поддерживает широкий Choice форматов:
    • Video, PDF, Office (documents), Files (downloadable to the device);
    • Links to external resources;
    • Longread (internal text editor);
    • Interactive formats SCORM I H5P.
  • Important Restrictionafter saving the material, it type cannot be changed.
  • Loadingdepending on the selected type, an area appears for selecting a file from the media library or inserting a link.

2. "Settings" Stage

Here, access parameters and material classification in the system are set:

  • ClassificationMaterial is bound to a specific Shelf I CategoriesYou can also specify which competence develops the study of this content.
  • Parameters and Gamificationthe number of points is set XP (experience) that the user will receive (e.g., 10 XP).
  • Additional Settings:
    • InteractionSwitches for enabling comments and bindings Feedback Forms (FF).
    • VisibilityOptions "Hide in catalog" or "Hide from extranet" (external users).
    • TargetingAbility to restrict access to the material by selecting specific subdivisions organizations.

3. "Approval" Stage

The final (optional) stage allows you to configure a chain of checks before publishing the material:

  • Approval RouteA moderator can set up a multi-stage content approval process.
  • StagesFor each stage (e.g., "Preliminary Approval"), you can add one or more matching.
  • ManagementUnnecessary stages or approvers can be removed using the trash can icon.

Knowledge base materials can exist as standalone units or be part of a collection. courses, programsAfter successfully passing all approval stages and obtaining the necessary approvals, Material becomes available to users in the section "My Materials".

6.4. Assignment material

Any Material can be assigned to employees through the module. Purposes.

After assigning Material, it will appear in the user's Personal Account under the My Materials tab in Section Assigned. 

6.5. Material in the course, program

Material can be added to the Course program.

Materials that include: video, PDF, SCORM - can be viewed immediately upon opening, while other materials - by downloading to the device or opening in a separate browser window.

The materials include an element that allows tracking of material review - a checkmark at the top with the label "Reviewed".

6.6. Material Statuses

The materials have the following statuses:

  • By creation: published; draft.
  • Upon completion: Passed; Not Passed; Not Started; In Progress.

7. Program creation

7.1. Introduction

The "Programs" module is designed for creating comprehensive development programs. For example, New Employee Onboarding, Learning talent pool development, and others. Using this program, you can create any learning and development scenario.

Programs can be formed from the following modules:

  • knowledge base materials,
  • опросы,
  • courses,
  • tests,
  • lessons,
  • Activities that may include events or tasks with checklists.

Programs can be completed sequentially and in parallel. That is, unlike courses where all modules are completed sequentially, programs can have multiple stages (levels, tiers) with their own sequential modules. For example, Program might look as follows:

  • Stage 1
    • Module 1.1.1., Module 1.1.2...
    • Module 1.2.1., Module 1.2.2., Module 1.2.3....
  • Stage 2
    • Module 2.1
    • Module 2.2
    • Module 2.3

etc.

Difference between a course and a program:


Course Program
Possible modules Lesson, Test, Material, Survey Lesson, Test, Material, Course, activity (Event, task), Survey
Sequence walkthrough Sequential Completion per single module Sequential and parallel Completion. Stages and levels can be created for sequential completion of modules.

7.2. Program Creation

1. Stage "BASIC"

In the first step, the moderator sets the basic parameters and visual design of the program:

  • Identificationindicates mandatory Program nameis selected Logo (Cover) from the media library and is set Subject (Using the # sign before a word turns it into a tag).
  • ClassificationProgram is bound to a specific Catalog section for user navigation convenience.
  • DescriptionFields are filled in "Program objective" (short expected result) "Program Description" (Full text for participants).

2. "CONTENTS" Stage

This stage is dedicated to design. Program Structurewhich may consist of several stages.

  • Formation of stagesA moderator can create sequential learning blocks using the button. "+ Add stage"For each stage, you can specify a name (for example, "Stage 1").
  • Module populationYou can add any educational components to the program by switching between tabs in the right panel:
    • Courses, Tests, Lessons;
    • Activities (tasks or activities);
    • Materials knowledge bases (with shelf search);
    • Surveys.
  • ManagementThe selected modules are displayed on the left side of the screen within a specific stage. The moderator can delete them (the "x" icon) or configure the access period in days.

Attention! Only published modules are displayed in these sections. Draft modules are not shown here. 

  • Each module can be assigned a training period in days. By Default each module has 0 days. The system will automatically calculate the program completion date when the start date is set during program assignment. After the availability period expires, Program will disappear from the user's personal account.
  • If Program is assigned, it cannot be modified. An assigned program can be unpublished and moved to the archive. Once moved to the archive, Program will disappear from the personal accounts of those to whom it was assigned.

3. "SETTINGS" Stage

The final stage defines the rules of passage and the system's logic:

  • GamificationThe moderator activates point accrual. Two calculation methods are available: summation of points from all nested modules or manual entry fixed sum for the entire program.
  • Feedback Form (FF)The toggle allows you to enable the mandatory Survey, which the user must complete after finishing the entire program.
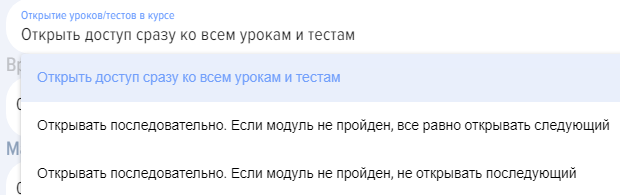
  • Method of opening modulesdetermines the rigidity of the educational pathway:
    • FreeAccess to all modules and stages is open immediately.
    • Sequentially (gently)Modules open sequentially, even if the previous one was not Passed successfully.
    • Sequentially (strictly)The next module will not open until the current one is successfully Finished.

To navigate between stages, use the "Back" and "Next" buttons located at the bottom of the interface. The programs in which the user participates are displayed in their personal account in the section "My Programs".

7.3. Other Program Actions: Deletion, Copying, Archiving

Program Removal. Any program can be deleted. Any assignments that were made and the results of their completion will also be deleted. Deleted programs, assignments, and their completion results cannot be restored.

Copying the programCreate a copy to quickly make an identical program.

Archive transferAny program can be moved to the archive, including published ones. When moved to the archive, it will disappear from users' personal accounts.

7.4. Completion Software

1. Programs are available for self-assignment through Catalog programs or can be assigned by a moderator (via templates or manually).

2. All assigned programs are available to the learner in Personal Account, under the My Programs tab - Assigned.

3. As the program progresses, it remains in the Assigned tab. Upon completion of all modules, Program moves to the Completed tab.

4. To open the module - click on it, it will open in a new window. 

To obtain the status for a lesson/material Passed It is absolutely necessary to press the button. Complete the module in the lesson or Acknowledged in the material. If you do not press the corresponding element, but close or proceed to the next module, then Status will remain Not Passed.

5. After successful completion of all modules Status, the entire program will automatically become like Passed.

6. The "Me Observer" tab contains programs where the employee is selected as the Program Manager.

In this tab, you can track the Status program execution in real time.

7.5. Program Statuses

Programs have the following statuses:

  • Status publication: published; draft (saved without publishing).
  • Success statuses: passed; Not Passed; In Progress. Passed means all modules have been completed.
  • Statuses by assignment: Self-Enrollment - self-initiated start of completion, assigned - assigned by the application moderator.

7.6. Reports on Program Completion Results

Program completion results are available to: moderators, limited-rights moderators, and program observers:

  • To the Observer - in the "My Programs - I Observer" section.
  • Moderator:
    • When assigning a program as a moderator - in the "Assignments - Program Results" section or in "Reports - Programs".
    • When self-assigning in "Reports - Programs". 

Frequently Asked Questions

Question: How to create Course?
Briefly: Via Section "Moderator → Content Creation → Create Course".

In detail:
- Quick creation: fill in the title, add modules (lessons, tests, materials) on a single page.
- Advanced Creation: Complete 4 stages - "Basics", "Structure", "Settings", "Check".
- Import: load a ready-made structure via Excel (.xlsx) or JSON (.udata).
- Nika.AI: Use the AI constructor to automatically generate a course based on the topic and sources.

Course cannot consist of only one test. To publish a single test, use Catalog tests.

Question: Why is the "Publish Course" button inactive?
Possible causes:
- The required field "Course Name" is not filled in
- No modules added (Lesson, Test, Material)
- The name contains prohibited characters (e.g., emojis)
- Course already exists with the same name in the catalog.

Question: How to assign Course to employees?
- Individually or by departments: via the Section "Assignments" in the moderator's office.
- Automatic: create a program with the "New Employee Template" option - Course will be assigned automatically when an employee is added to the system.
- Self-Assignment: publish the Course in the catalog so that employees can register independently.

Question: What to do if Course is not displayed for an employee?
Check:
1. Status of the course: it must be "Published"
2. Access settings: check if the "Hide in directory" or "Only for departments" option is activated.
3. Availability Period: Has the publication period expired?

Tests

Question: How to create Test?
Creation options:
1. Quick Creation: Enter the title and add questions on a single page.
2. Advanced Creation: configure parameters (time, pass-through Score, certificates) in 4 stages.
3. Nika.AI: Upload a document or specify a topic - AI will generate questions automatically.
4. Import: download the Excel template, fill it out, and upload it via "Test Import".

Required fields: test name, time for Completion, passing Score, at least one question with marked correct answers.

Question: Why is the "Publish Test" button inactive?
Check:
- ✅ Name filled in (no special characters)
- ✅ Questions added
- ✅ Correct answers are marked for multiple-choice questions
- ✅ Reviewers have been assigned for open-ended questions
- ✅ There is no test with the same name in the catalog
- ✅ Question weights (if used) are set correctly (without fractions)

Question: What types of questions are supported?

  • Choice. One or more correct answers from the list.
  • Matching. Connecting elements from two columns.
  • Sequence. Arranging elements in the correct order.
  • Substitution. Fill in the blanks in the text.
  • Open. Free Answer, checked manually.

Question: How to configure test results display?
In the test settings, select one of the options:
1. Do not show answers - results are visible only to moderators.
2. Show rating - the employee sees whether Correct or Incorrect was given to Answer. At the same time, they will not see the correct results.
3. Show answers and score - correct/incorrect answers are visible
4. Show error immediately - highlight incorrect answer at the moment of selection.

Question: What to do if an employee has completed Test, but in the report they are marked as "Not Started"?
Check the report generation period. If the test completion date falls outside the selected range, the result will not be displayed. Adjust the dates in the report filter.

Lessons and materials

Question: What lesson formats are supported?

In an LMS, there are different types of content, divided into two categories: created and uploaded externally, and created within the LMS.

Downloadable:

  • Video Tutorial. The video is uploaded to an external hosting service (YouTube, Vimeo, VK Video, etc.).
  • PDF. Uploading presentations, instructions; supports resuming from the point of interruption.
  • SCORM. Uploading ready-made learning packages (SCORM 1.2, SCORM 2004 are supported).
  • Office. Word, Excel, PowerPoint documents.

Created within the LMS:

  • cfroj. An interactive editor with the capability to create Learning in web-flow format.
  • H5P. Interactive content builder, over 50 content types.
  • Longread. A text editor with the capability to insert video, audio, and images.

You can add an unlimited number of supplementary materials and links to any lesson.

Question: Why is the "Publish Lesson" button inactive?
- Lesson title not filled in
- Main content not added (except for video tutorials - a title is sufficient for them)
- The name contains prohibited characters

Question: How to insert video, audio, or image into Longread?
1. Click "Insert" → "Image" (for pictures) or "Insert" → "Media" (for video/audio).
2. Select a file or paste a link to an external resource

Videos from video hosting platforms are auto-scaled. Videos within a longread require manual size adjustment.

Question: Is it possible to upload a video from a local disk?
- In the video tutorial: no, only via external video hosting
- In Longread, cforj, H5P, or additional materials: yes. In the Longread, cforj, H5P - it will be played; in additional materials - it will be downloaded to the user's device.

Question: Why don't videos scale automatically?
- Video from hosting: automatically scales
- **Video in a longread**: requires manual size adjustment in the editor

Training Programs

Question: How does Program differ from a course?

Answer:


Course Program
Possible modules Lesson, Test, Material, Survey Lesson, Test, Material, Course, activity (Event, task), Survey
Sequence walkthrough Sequential Completion per single module Sequential and parallel Completion. Stages and levels can be created for sequential completion of modules.

Question: How to create an onboarding program for new employees?
1. Create a program in the "Program Catalog".
2. Create Assignment programs. In the Program Assignments module, activate the option Assignment Template for New Employees.

After that, when a new employee is added to the system, Program will be assigned automatically.

Question: How to configure the Sequence module completion settings in the program?
In the program settings, select one of the modes:
- Free access: all modules are available immediately
- **Sequential (soft):** the next module opens after the previous one is completed (regardless of the result)
- Sequential (strict): access to the next module only upon successful completion of the previous one

Knowledge base and materials

Question: What is a "Shelf" in the Knowledge Base?
"Shelf" is a category for grouping materials (e.g., "Onboarding", "Sales", "Security"). You can add materials of any available content types to a shelf.

Question: How to add Material to Course or a program?
1. Create Material in the required "Shelf" of the Knowledge Base (or Material Without a shelf).
2. When editing a course/program, click "+ Add Material".
3. Select Material from the list available in the same section of the catalog.

If there are many materials, start typing the name in the search - the system will filter the list.

Question: What statuses do materials have?

By publication: Published / Draft.

By status Completion: Not Started / In Progress / Passed / Not Passed.

Material is considered "Completed" only after clicking the "Acknowledged" button.

Technical questions

Question: Are there any restrictions on the size of uploaded files?
There are no official restrictions, but please consider:
- User internet connection speed
- Available disk space on the server
- For AI processing (Nika.AI): files up to 5 MB and 300,000 characters.

Вопрос: Что делать при ошибке 153 при загрузке видео?
The error indicates that the video has an age restriction of 18+. Such videos cannot be embedded in lessons. Solution:
- Remove the age restriction Restriction in the video settings on the hosting platform.
- Or use an alternative source without restrictions

Question: How do points work in the gamification system?
- Points are awarded for Completion courses, tests, lessons
- Configuration: in the "Application Settings → Points" section or individually for each course/program.
- Accrual options:
  - Summation of module scores
  - Fixed value manually

Question: Is it possible to grant course access to specific employees rather than the entire department?

Answer:

The following options are possible:

1. Hide Course in the catalog and assign it to specific employees. Only these employees will see it in their personal account in the My Courses section.

2. For Bitrix24. Create a group in Bitrix with these employees. Then link Course to the Bitrix group via the Section "Groups" application.

Question: Why can't I Publish Course?

Answer:
To Publish Course, it is necessary to:

  1. Specify the course name (this is a required field).

  2. Add at least one Lesson or Material.

⚠️ Note:

  • If special characters or emojis (such as the skateboard emoji 🛹) are used in the title or other fields, the system may not save Course or allow Publish.

Question: Where can I view the course completion results?

Answer:

In Appendix 4, the following roles can view course completion results:

  • The moderator can view the results in the reports: Moderator - Learning Management - Reports.
  • An employee who has completed Learning can view the results in their personal account in the My Courses section by expanding the corresponding Course, if this option was provided when the course was created. They can also build a report in the My Profile and Progress section.
  • The manager can build reports on subordinates in the My Profile and Progress section.

Question: Course Finished, but the report shows that Course Not Passed.

Answer:

Check if all modules with status "Passed" have been passed. Update the application via the Browser.

If all modules are in the passed status, but Course remains in the "Not Passed" status, please contact support.

Question: How to hide Course from users?

Answer:

All courses when published By Default are available to everyone for self-enrollment in the course catalog. Self-Assignment means an employee opens Course and completes it without being assigned by a moderator.

Each Course can be restricted in availability:

  • By adding it to a group (for Bitrix24 and if the functionality is available). Course will only be accessible to group members).
  • Via settings during creation:
    • hide completely from all - hide in directory,
    • make available to specific departments.

If Course is hidden via settings and then assigned, those to whom it is assigned will see it via their Personal Account My Courses - Assigned. All others will still not see it.

Question: Is it possible to grant access to a course/test to specific employees rather than the entire department?

Answer:

Currently not available, only for the department. This option is under development, and in the near future, it will be possible to grant access to a course or test to specific employees. To do this, when creating a course, you will need to specify the employees who will be granted access to the course/test.

Question: Why does Status not change for a course when an employee has completed it?

Answer:

Courses have the following statuses:

  • Status publications:
    • published;
    • draft (saved without publishing).
  • Passing statuses:
    • Not Started. Start button not pressed in the course.
    • In Progress. Start button pressed in the course, but not all modules are completed.
    • Passed. Passed - all modules completed. Tests with status "Passed" (successfully), all lessons/materials viewed (Complete or Acknowledged button pressed). If the Complete Module button in the lesson is not pressed, then Lesson Not Passed, if the Acknowledged element in the material is not pressed, then Material Not Passed.
    • Not Passed. Indicates that one of the modules Not Passed: Test, Lesson (the Complete button is not pressed), Material (the Acknowledged element is not pressed).
  • Statuses by Purpose:
    • Self-Enrollment - the employee clicked on Pass Learning,
    • appointed - appointed as the application moderator.

If Status of course Not Started or In Progress, it means that one of the modules within course Not Passed:

  • Not Passed Test;
  • Not Passed Lesson (Finish Module button pressed in the lesson);
  • Not Passed Material (the Acknowledged element in the material is pressed).

After successful completion of all modules Status, the course automatically changes to Passed. 

Question: Why can't employees see Catalog courses, Catalog tests, the knowledge base?

Answer:

If employees cannot see Catalog courses or Catalog tests or the knowledge base, while the moderator can see them, this means that the corresponding Catalog is hidden from employees in the settings.

Catalogs are hidden in the section: Moderator - Application Settings - Other. Modules can also be disabled: Moderator - System Management - Modules.

Question: How is Course created and what can it consist of?

Answer:

Course in the Brusnika.LMS system can consist of any number and sequence of lessons, tests, materials, and surveys. When creating a course, the name, objective, duration (filled in automatically), a textual description of the program are specified, and at least one module (Lesson or Material) is added. Course cannot consist of only one test; in this case, Test is published directly in the test catalog. Modules for the course are selected from published lessons, tests, and materials.

Answer: What are the main settings available when creating a course?

Answer:

When creating a course, numerous settings are available:

  • Image: Course card image.
  • Section catalog and Subject: For filtering courses. Subject can be marked as a tag using the "#" symbol.
  • Competencies: Can create an individual development plan if developmental activities are linked to the competency and the user has not achieved the passing score Score in the tests.
  • Comments and certificates: Allows users to leave comments and issues Certificate after successful completion.
  • Feedback Form (FF): Displayed after completing the course.
  • Points: Individual scoring for Course can be calculated by summing module scores or entered manually.
  • Hidden in catalog: Course may be hidden from public access but available by moderator assignment.
  • Availability by departments: Restriction access to the course for employees of selected departments.
  • Access to modules opening: Sequential or simultaneous module opening, with the possibility of a condition for successful completion of the previous module.
  • Time on Completion and number of attempts: Restriction by time and number of course completions.
  • Availability Period: Indication of the deadline until which Course is available.

Answer: What is the difference between linear and tree-like course representation?

Answer:

Course in the appendix Brusnika.LMS can be presented in two forms:

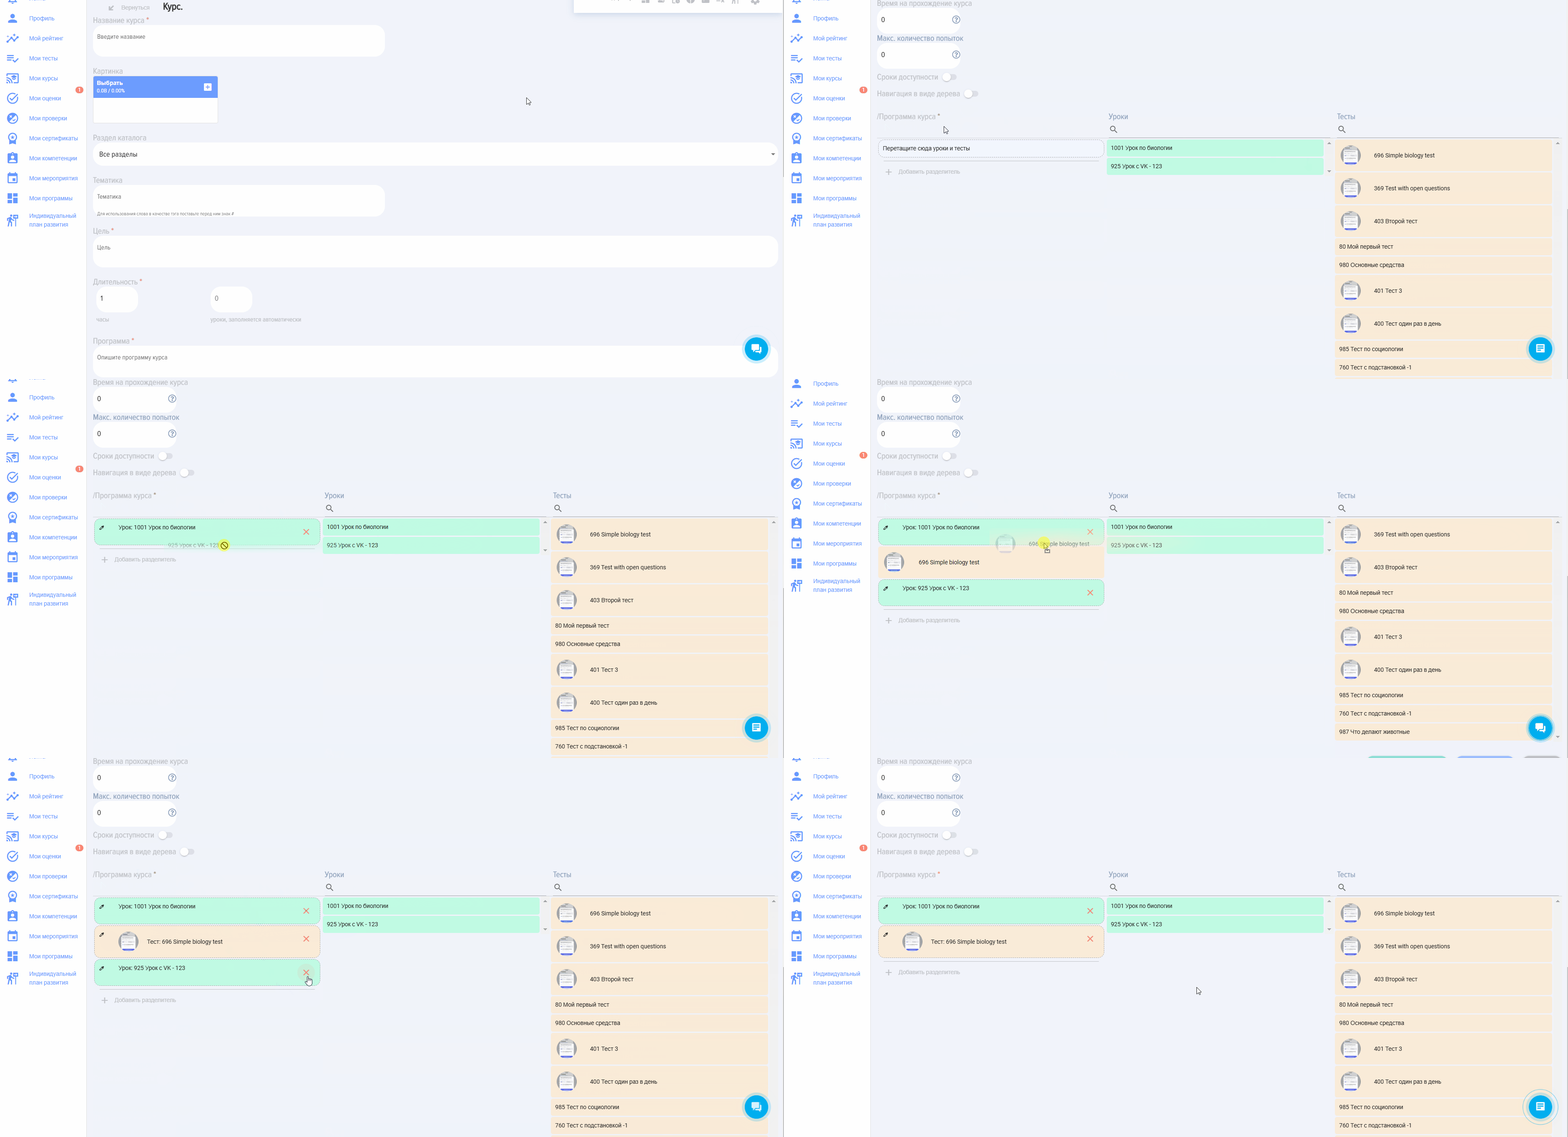
  • Linear representation: The course modules are arranged sequentially. Course is assembled by dragging lessons, tests, and materials in a specific order. You can change the color of module cards, add separators for thematic blocks, and edit module names.
  • Tree view: Allows creating a more complex structure with sub-levels. After activating this mode, you can drag modules into the "Program course" area and create dividers, inside which you can also add modules, forming a hierarchical structure.

Question: When creating a course, program, or searching for a lesson/test, the system does not find it, even though Lesson/Test is published.

Answer:

Check if the search data is entered correctly.

Question: How can I find out at which stage of the course the students are currently, what has been completed and what hasn't?

Answer:

To obtain detailed analytics on the completion status of each module, it is necessary to generate the "Module Completion Status" report."employees-courses".

Question: Publish Test does not give

Answer:

If the Publish button is not active, check the following options:

  • One of the required fields (name, time on Test, passing Score) is not filled;
  • Specific symbols have been entered in the test name (e.g., a snowboarder emoji);
  • Questions not added;
  • No correct answers selected;
  • No reviewers selected for open questions (if any);
  • In the test catalog, there is Test with the same name.

Question: The test is not in the My Tests section

Answer:

Test falls into Section My tests in the following cases:

  • The user started taking the Test test from the test catalog. Test will be added to Section Completed or In Progress attempts.
  • Test is assigned to the user (not as part of a course or program, but as a separate Test). It appears in Section Assigned.
  • Test and the user have been added to the same group (for Bitrix 24).

If the user does not see Test in their personal account under My Tests, the following scenarios are possible:

  • Not Startedabout Completion.
  • Test is included in the course. Then it will be in the My Tests section.
  • Test in the program, then it will be in the My Programs section.
  • Test is included in the Group (for Bitrix 24). Then Test will be available in the My Groups section.

Question: The user does not see Test in the test catalog

Answer:

If the user does not see Test in the test catalog, the following options are possible:

  • Test in the course. Then Test will be in the course catalog.
  • Test in the program. Then Test will be in the program directory.
  • Test in the group (for Bitrix 24). Then Test will see the test catalog only the members of this group.
  • Test is hidden in settings when creating a test: hidden in the catalog or available only to specific users.
  • Availability Period test has expired. When creating a test, you can specify Availability Period after which Test will not be available in the catalog.

Question: Is it possible to add 100 or more questions to Test?

Answer:

Yes, you can add any number of questions to Test. There are no restrictions.

Question: How to make Test with answer options Yes, No?

Answer:

Enter the answer option Yes, enter the answer option No and select Correct Answer.

Question: How to hide Test?

Answer:

By Default all tests are open and accessible to all employees in the tests directory when published. Tests can be hidden or their availability restricted in the following ways.

When creating a test in test settings:

  • Hide in the test catalog. Test no one will see it. If assigned, it will be visible to employees to whom it is assigned in the My Tests section.
  • Restrict availability for specific departments (employees). In this case, Test will only be accessible to selected employees.
  • Availability Period. When creating a test, select its availability period. After the availability period ends, Test will be hidden in the catalog.
  • Add to group (for Bitrix24). If Test is added to a group in the application (linked to a Bitrix24 group), then Test in the catalog will only be visible to members of that group.

Question: Does the case sensitivity (uppercase, lowercase letters) matter for substitution questions?

Answer:

No, it does not take into account.

Question: Where can I view the test results?

Answer:

Different roles can view test results in different sections:

  • Moderator The application allows you to view test results in reports: Settings - Reports.
  • Moderator with limited permissionsmanager The employee can view it in the reports. The reports will be located in the left menu of the personal account.
  • Employee who has passed the testIf the test option is selected where the employee can view results, they will be presented in the My Tests section when the test is expanded. Additionally, the employee can generate reports, but only for themselves.

Question: Tests have disappeared from the test catalog. I cannot see the tests in the test catalog. I am a moderator. Where did they disappear?

Answer:

Update your browser. If the tests do not appear, they were likely deleted by another moderator. The LMS system does not provide for and does not allow the deletion of tests.

Question: The employee completed Test, where can I view the test results?

Answer:

Test results can be viewed in different locations, depending on the role of the person planning to view the test results: Testee, the manager of the test taker, the moderator.

Testee.

An employee who has taken the test can view the test results in two places:

  • My tests - "Completed" or In Progress tab. Open the required Test, results will be displayed. The detail level of results will depend on the settings chosen during test creation.
  • Reports. In the My Profile and Progress tab. You can build any reports only for yourself; other employees cannot be selected.

Employee's supervisor.

  • Reports. In the My Profile and Progress tab. You can build any reports there. When selecting employees, a manager can choose any of their subordinates.

Moderator.

  • Learning Management - Reports. A moderator can generate any reports for any employees.

Question: What types of tests exist and how are they displayed to users?

Answer:

Tests in the application can be of two main types: standalone I built-in.

  • Self-tests are displayed in the general test catalog and in the user's personal account in the "My Tests" section.

  • Built-in tests can be part of a course, training program, or group (for Bitrix 24). They are displayed in the corresponding sections: in course/program catalogs and in "My Courses"/"My Programs" within the respective course or program. If Test is embedded in a Bitrix 24 group, it will be visible to users in the My Groups tab within that group, and in the general catalog it will only be available to members of that group.

Question: What mandatory settings must be configured when creating a test to make it Publish?

Answer:

To successfully publish a test, you must fill in several required fields and ensure the accuracy of the entered data. These include:

  • Test nameIt is important that the name is unique and does not contain special characters (such as emojis).

  • Time on TestIt is necessary to specify the time limit allocated for the Completion test.

  • Passage ScoreIt is determined as a percentage and takes into account the weights of the questions, if they are assigned.

  • QuestionsTest must contain the added questions.

  • Correct answersFor each question, the correct answers must be selected.

  • Reviewers in open-ended questionsIf the test contains open-ended questions, it is necessary to assign examiners.

If the "Publish" button is inactive, it is likely that one of these conditions is not Completed.

Question: How can I manage the visibility and availability of tests for different user groups?

Answer:

The visibility and accessibility of tests can be flexibly configured during their creation:

  • Hiding in the catalogTest will not be displayed in the general catalog but will become available in the "My Tests" section for employees to whom it was assigned.

  • Restriction by departmentsTest will be available only to employees of selected departments.

  • Availability PeriodYou can set a specific period during which Test will be available in the catalog. After the deadline expires, Test is automatically hidden.

  • Adding to group (for Bitrix24)If Test is added to a group, it will only be visible to members of that group in the test catalog.

Question: What types of questions are supported in the system and how to assign their weight?

Answer:

The following types of questions are available in the application:

  • ChoiceAllows selecting one or more correct answers.

  • SequenceRequires restoration of the correct order of elements.

  • MatchingAssumes establishing the correct correspondence between elements.

  • OpenFree-response question requiring manual review by an assigned moderator.

  • SubstitutionThe need to fill in the blanks in the text.

The weight of the matter By Default is equal to one, but it can be configured individually. The system automatically recalculates the weights of all questions as percentages based on the sum of all assigned weights. The pass-through Score is calculated taking into account these weighting coefficients, which allows for greater emphasis on specific issues.

Question: What are "Blocks" used for in tests and how to work with them?

Answer:

The "Blocks" feature allows organizing test questions into thematic blocks. This is particularly convenient for creating large question databases.

General block workflow:

  1. Activation of the "Blocks" Function in the test settings.

  2. Creating thematic blocks in the "Blocks" tab, specifying only their names.

  3. Binding each question to a specific thematic block during its creation.

  4. Activation or deactivation of required blocks when assigning a test.

During the test, the system will display questions only from active blocks, allowing testing on specific topics from a large general question database.

Question: How can a user view their test results and who else has access to them?

Answer:

The ability to view test results for a user depends on the settings selected when creating the test. Four options are available:

  • Do not show answers.The results are only available to moderators.

  • Show questions with ratingThe employee sees which questions they answered correctly/incorrectly, but without detailed correct answers.

  • Show questions, answers, ratingThe employee sees which answers were correct and which were not.

  • Show Incorrect Answer immediatelyDuring the test, the correctness of the answer is immediately highlighted, but without displaying the correct results.

If the second or third option is selected, the employee can view their results in the personal account under the "My Tests" section by opening the corresponding Test and selecting "Test Results". The employee can also generate reports, but only for themselves.

Other roles have access to the results as follows:

  • Application ModeratorCan view all test results in the "Training Management - Reports" section.

  • Moderator with limited permissions, employee supervisorThey can also view reports in their personal account. The manager can select any of their subordinates.

Question: What to do if Test is not displayed in the "My Tests" section or in the test catalog?

If Test is not visible in the "My Tests" section, this could be due to several reasons:

  • Test Not StartedThe user has not yet started taking the test from the catalog. At the same time, this Test is not assigned.

  • Test is part of a course or programIn this case, it will be available in the "My Courses" or "My Programs" sections respectively.

  • Test is included in the group (for Bitrix24)Test will be available in the "My Groups" section.

  • Test assignedIt should be visible in the "My Tests" section.

If Test is not displayed in the test catalog, the following reasons are possible:

  • Test is embedded in Course or the programIt will be in the course/program catalogs.

  • Test in group (for Bitrix24)It will only be visible to members of this group.

  • Visibility settingsTest is hidden in the directory or accessible only to specific departments/users.

  • Expired Availability PeriodThe availability period set during test creation has expired.

  • Cache issueSometimes clearing the application cache ("Feed - Clear application cache") or refreshing the browser helps.

The LMS system itself does not provide for test deletion, so their disappearance is typically related to visibility settings or actions by another moderator.

Question: What test actions are available to moderators, and in which formats can tests be imported/exported?

Only application moderators can perform the following actions with tests:

  • Creation and editingCreate new tests and modify existing ones. To create a test, click "Add" in the test catalog and fill out the "Test Settings," "Test Questions," and "Blocks" tabs (if activated). To edit, click the corresponding element in the test card.

  • CopyingCreates a copy of the test with the "Draft" status.

  • RemovalIrreversibly deletes Test.

  • ImportAllows loading tests from external files. Two formats are supported: UDATA (for backup or transfer between portals) and Excel (convenient for creating large question databases using templates). The import format is selected in the application settings.

  • ExportAllows exporting tests in the selected format (UDATA or Excel), specified in the application settings.

Any employee can take the tests.

Question: Where to enter answer options in tests?

Answer:

Brief Answer: Answer options are entered when creating a question - after saving the question.

Details:

• "Choice" - add options (e.g., "Yes", "No").

• "Sequence" - insert elements to restore order.

• "Matching" - enter "left ↔ right" pairs.

• "Substitution" - fill in the blanks in the text.

• "Open" - no variants required (free Answer).

Question: How to create Test?

Answer:

Open the Catalog of tests and click the plus sign in the top right corner labeled "Add". The test creation studio will open. Fill in the "Test Settings", in the "Test Questions" section, enter the questions and their corresponding answers sequentially. After completion, publish the Test. The Test is ready to be taken and assigned.

Attention! Only application moderators can create tests. Periodically save Test when you create it. 

Question: The employee completed Test, but in the reports we see that Test Not Started. Why is this happening?

Answer:

Brief Answer: Check the report generation period. It appears that the test completion dates and the report generation dates do not match. Therefore, during the report generation period, the employee did not undergo Test.

Question: How to assign (select) reviewers for open-ended questions?

Answer:

When creating an open-ended question, after the Open question is entered and added, it will appear in the question lists. This question will have a person icon with a plus sign. This element is intended for adding reviewers.

Question: How to download Test?

Answer:

To download Test, open Catalog tests, find the "Export" element in the test card you want to download. Click on it, Test will be downloaded.

Question: How to split one large Test into several tests with fewer questions?

Answer:

Option 1. Copy Test, then delete unnecessary questions in the test copy. Do this several times with the original test.

Option 2. Export Test in Excel format. Generate the required tests from this test and then import them into the LMS. Be careful when deleting unnecessary questions - if the import template structure is compromised, Test may fail to import or import with errors.

Question: Why is the save test button inactive?

Answer:

The test save button is inactive only in two cases:

  • When no test name is entered;

  • When does the test autosave occur. Test autosave occurs whenever changes are made to fields, questions, answers, etc. are added.

Question: What are surveys in Brusnika.LMS and how do they differ from tests?

Answer:

Surveys in Brusnika.LMS are tools for collecting opinions and information on various topics. Their key distinction from tests lies in the absence of right or wrong answers. Surveys are designed to gather feedback and analyze opinions, whereas tests assess knowledge.

Question: Where can I create Survey?

Answer:

Survey can be created in the "Moderator - Content Creation - Create Poll" section.

Question: What types of questions can be used when creating a survey?

Answer:

Currently, the following types are available when creating a survey.

1. Choice options:

  • One optionThe respondent can select only one Answer from the provided list.

  • Several optionsallows marking multiple suitable answers simultaneously.

  • Yes / Nosimplified format for choosing between two opposite options.

  • Dropdown listcompact display of selection options, convenient for large lists.

2. Assessment Scales

  • Scale 1-5 I Scale 0-10Classical digital scales for assessing satisfaction or quality levels.

  • NPS 0-10Specialized scale for measuring the Net Promoter Score (NPS).

  • Likert Scaleis used to determine the degree of a respondent's agreement or disagreement with a specific statement (e.g., from "strongly disagree" to "strongly agree").

3. Text and precise data

  • Short textfield for entering a short answer (e.g., a surname or department name).

  • Long textexpanded field for entering detailed comments, suggestions, or feedback.

  • Numberfield that accepts only numeric values.

  • Datespecialized field for selecting a specific day, month, and year.

4. Complex Formats

  • Matrix: табличный формат вопроса, где нужно оценить несколько параметров по одной шкале (например, несколько характеристик сервиса).

  • File uploadallows the respondent to attach a document, image, or other file to the response.

Each of these types can be made mandatory to be filled, which will not allow the participant to complete Survey without answering this question.

Question: What settings can be configured for a poll?

When creating a survey, you can configure the following parameters:

  • Anonymity level: The user can decide whether their Answer will be anonymous, or choose between a public (all votes are visible) or fully anonymous option.

  • Allow multiple responses: By Default each user can only give one Answer, but this option can be changed.

  • Enable comments: You can allow or disable comments on the poll.

  • Enable likes: You can allow or disable likes for the poll.

  • Availability Level: By Default Survey is available to all users. However, you can configure availability for specific employees by unchecking the corresponding checkbox.

Question: How can I view the poll results?

Answer:

The survey results can be viewed directly within the survey itself (if this setting is enabled). Furthermore, a summary report of the results from all surveys for a specific period can be generated in the "Reports" section.

Question: Is it possible to add Event to the calendar for all event participants?

Answer:

For some systems (such as Bitrix24), events are automatically added to the calendar.

Please note that the moderator must Rights make changes to the calendar that is selected when creating the Event. If such permissions are not available, then Event will not be added to this calendar.

Question: How can I create a Event in the system?

Answer:

A moderator can create a Event via a special card by filling in fields such as name, start and end date, type, category, description, organizer, responsible person, participant list, participant limit, color settings, as well as send invitations and attach a feedback form.

Question: What main functions are available when a moderator creates an event?

Answer:

The moderator specifies when creating an event:

  • Title, start and completion of the event.
  • Type (internal, external) and event category from the exhaustive list.
  • Description, organizer, and responsible person for Event.
  • List of participants, setting a participant limit. The system will notify the employee when the limit is exceeded.
  • Event color settings, as well as invitation text.
  • By Default active feedback form output function.
  • The right side of the card contains Section for coordinating employee applications.

Question: How can an employee participate in an event?

Answer:

An employee selects the desired Event from the Event Catalog and submits an application by clicking the corresponding element. Once the moderator approves the application (the moderator will have a list of applicants), the employee will be added to the list of participants, and Event will appear in their personal account and calendar (for Bitrix 24).

Question: What reports can be generated for events?

Answer:

Based on the results of participation in events, you can generate the "Events: External, In-person" report in the "Reports" section. If a feedback form was added to the event, you can also build reports based on these forms.

Question: What statuses can events have?

Answer:

Events can have the following statuses:

  • Published
  • "Not published"

Question: Can Event be added to the calendar for all participants?

Answer:

Yes, for some systems, such as Bitrix24, events are automatically added to participants' calendars. It is important that the moderator has the necessary Rights to make changes to the selected calendar when creating an event; otherwise, the Event will not be added.

Question: Where can I hide Catalog events?

Answer:

Catalog events can be hidden in the application settings (Section "Settings - Other"). However, it will remain accessible to application moderators.

Question: What actions can be performed with created lessons and how do their statuses affect Completion?

Answer:

The following actions can be performed with the lesson:

  • Edit: Modify lesson content and parameters.
  • Delete: Completely remove Lesson from the system.
  • Export: Save Lesson or transfer it to another portal. Export is available in Excel format (text content only) or UDATA (entire lesson content). The export format can be configured in the application.
  • Create a copy: A duplicate of the lesson is created with a similar title (with the prefix "Copy") in the "Draft" status.

Lessons have publication statuses ("published", "draft") and completion statuses ("Passed", "Not Passed"). Lesson is considered "completed" only after the user clicks the "Finish" button. If the button is not clicked, Lesson is displayed as "Not Passed".

Question: How does the Brusnika.LMS system process points for Completion lessons and how are they used?

Answer:

When completing a lesson, users may earn points, the quantity of which is configured when adding the lesson. These points are factored into the calculation of the user's overall rating in the system, which is part of the gamification functionality. 

Question: Is it possible to export a list of all lessons? Including to Excel.

Answer:

It is not possible to export all lessons as a list. We will include this feature in our development plan. 

Question: When trying to upload a video, error 153 appears.

Answer:

This error occurs when the video is marked as 18+. You need to disable this setting in the video settings. Such videos cannot be viewed on any third-party platforms, only on the video hosting site itself.

Question: What is the Knowledge Base in Brusnika.LMS and what is it used for?

Answer:

The Knowledge Base is a module in the Brusnika.LMS system designed for storing and organizing training materials and documents. It is used for employee training processes and familiarizing them with necessary information.

Question: What is the overall structure of the Knowledge Base? The Knowledge Base is organized into the following main sections: 1. **General Information** - Introduction and overview - Key concepts and terminology - Frequently Asked Questions (FAQ) 2. **User Guides** - Step-by-step instructions for common tasks - Tutorials for new users - Best practices and tips 3. **Technical Documentation** - System architecture and components - API references and integration guides - Troubleshooting and error codes 4. **Administrative Section** - User and role management - System configuration and settings - Backup and maintenance procedures 5. **Additional Resources** - Links to related documents and external resources - Glossary of terms - Version history and release notes This structure ensures that information is easily accessible and categorized for different user needs.

Answer:

The overall structure of the Knowledge Base is organized using "Shelves". Shelves serve as containers into which various materials are added.

Question: What types of materials can be created in the Knowledge Base?

Answer:

The Knowledge Base allows you to create the following types of materials:

  • PDF files: Uploading ready-made PDF documents.
  • Longreads; combination of text, audio, video and images to create rich content.
  • Media Resources: Primarily video and audio files that can be embedded from various video hosting platforms using HTML links.
  • SCORM packages: any standards.
  • Files: Any other file types that can be uploaded in unlimited quantities.
  • References: To internal or external sources, such as documents that employees need to review.

Question: How to create a "Shelf" in the Knowledge Base?

Answer:

To create a shelf, click "Add Shelf". In the opened window, you can add an image, a title (required field), description, category, and competency. You can also configure parameters such as comment permissions, displaying a feedback form, awarding points (for gamification), hiding from the catalog or from extranet users, as well as Restriction visibility for specific departments. To publish the shelf, activate the "Publish" toggle and click "Save".

Question: How to create "Material" and what settings are available during its creation?

Answer:

Чтобы создать Material, нужно открыть нужную полку и нажать "Добавить Material". В появившейся карточке вводится название, добавляется картинка и описание. Затем выбирается тип материала (PDF, Longread, Медиаресурс, SCORM, Файлы, Ссылки). Для каждого элемента внутри материала можно добавлять теги. Дополнительные настройки включают категорию, компетенцию, разрешение комментариев, показ анкеты обратной связи, начисление баллов, скрытие в каталоге/от экстранет-пользователей, Restriction по подразделениям и запуск процесса согласования материала.

Question: How can Material be assigned to employees?

Answer:

Any created Material can be assigned to employees through the "Assignments" module. After assignment, Material will appear in the user's personal account under the "My Materials" tab, in the "Assigned" section.

Question: How do Knowledge Base materials interact with courses and programs?

Answer:

Knowledge Base materials can be added to courses and programs. Materials containing video, PDF, SCORM, or Office files can be viewed directly upon opening, while other materials require downloading to a device or opening in a separate browser window. The system also allows monitoring of user engagement with the materials.

Question: What statuses can materials have in the Knowledge Base?

Answer:

Materials have two types of statuses:

  • By creation: "published" (Material available) or "draft" (Material is In Progress development and not yet published).
  • Upon completion: "Passed" (user has reviewed the material), "Not Passed" (user started but did not complete the review) or "Not Started" (user has not started the review.

Question: What is the difference between Course and a program?

Answer:

Course Program
Possible modules Lesson, Test, Material Lesson, Test, Material, Course, Event
Sequence walkthrough Sequential Completion per single module Sequential and parallel Completion. Stages and levels can be created for sequential completion of modules.

Question: How to create an onboarding program for newcomers?

Answer:

Create a program in the Program Catalog.

When creating the program, activate the "Onboarding Template - New Employees" option. Subsequently, when a new employee is added to the CRM system, Brusnika.LMS will automatically Assignment this program for each newly added employee.

Question: Is it possible to create a program and transfer Lessons into it? So that you can dive into Lessons and see the attached file (PDF/video file)?

Answer:

Yes, it is possible. PDF and video files can be uploaded directly to Lesson, as well as to the lesson's additional materials.

Question: Which modules can be included in the "Program"?

Answer:

"Program" can be composed of various types of modules, including:

  • Knowledge Base Materials
  • Courses (fully developed courses)
  • Tests
  • Lessons
  • Activities (e.g., "Mentor Meeting")
  • Surveys

These modules can be organized into stages for sequential or parallel progression.

Question: How can I assign a "Program" to users in the system?

Answer:

There are two main scenarios for program assignment:

1. Template programs: They allow for automatic program assignment.

    • For New Employees: When creating such a program and publishing it, all new employees added to the application or CRM system will automatically receive the Assignment of this program.
    • For groups (Bitrix24 only): The system automatically assigns the program to all participants of the selected group from Bitrix 24, as well as to new members added to this group in the future.
    • For departments. When adding a new employee to the department, they will be assigned a Program.

2. Standard Programs: These programs require manual assignment by a moderator. They can also be published in the program catalog for self-assignment by users.

When creating a program, you can specify the "Assignment Delay in Days" and assign a "Supervisor" (observer).

Question: What are the configuration options for the module sequence in the "Program"?

Answer:

In the "Program," you can configure how modules are opened:

  • By Default: Access is granted immediately to all lessons/tests/materials/events in the program.
  • Sequential opening regardless of success: The next module opens even if the previous one was not Passed successfully.
  • Sequential opening only upon successful completion: The next module opens only after successful completion of the previous one. This flexibility allows for the creation of various educational pathways.

Question: How are points awarded for Completion "Programs" in the gamification system?

Answer:

Points accrual within the gamification system can be configured in several ways:

  • By Default: Points are awarded according to the general application settings. If the general settings or program settings are not configured, points are not awarded.
  • Individual accrual: You can activate individual settings for the program, independent of the general ones. In this case, the following options are available:
  • To calculate by summing up points for modules: The application automatically calculates scores for each module (Lesson, Test, Course) and displays the overall Score for the program.
  • Enter manually: The number of points for the program is set manually. It is also possible to choose whether to award points separately for each module or only for the program as a whole.

Question: What actions can be performed with created "Programs" (besides creation and assignment)?

Answer:

In addition to creating and assigning, moderators can perform the following actions with programs:

  • Uninstalling the program: Any programs are possible. 
  • Copying the program: Allows you to quickly create an identical program for further editing.
  • Archiving: Any program can be transferred, including published ones. Program will disappear from users' personal accounts. It is important to note that an assigned program cannot be modified; it can only be deleted, unpublished, and moved to the archive.

Question: How does the user go through the "Program" and track their progress?

Answer:

Users can access programs through Catalog (Self-Assignment) or by moderator assignment.

  1. All assigned programs are displayed in the "My Programs - Assigned" tab in the personal account.
  2. As the modules are completed, Program remains in "Assigned" until all modules are finished.
  3. After successful completion of all modules, Program moves to the "Completed" tab.
  4. To complete a module, you need to click on it; it will open in a new window. For lessons and materials, it is critical to press the "Complete Module" or "Acknowledged" buttons; otherwise, Status will remain "Not Passed". Managers (supervisors) can track the progress of program completion in the "My Programs - I Observer" tab.

Question: Where can I view reports on the results of completing "Programs"?

Answer:

Reports on program completion results are available for various roles:

  • To the Observer (Manager): In the "My Programs - I Observer" section.
  • Moderator: If Program was assigned by a moderator: In the "Assignments - Program Results" section or in "Reports - Programs".
  • If Program was self-assigned by the user: In the "Reports - Programs" section. These reports allow tracking Status program progress in real time and analyzing results.

Question: How to unpublish an assigned program?

Answer:

It is necessary to deactivate Assignment. Find the required Assignment, open it, and move the slider to the inactive state. Press the Save button.

Then open the necessary program and deactivate it in the same manner.

Question: Is there an "Assignments" feature? For example, in Course we insert a video, and then an assignment - where an employee needs to write Answer and attach some solution, and then this assignment goes for review to the manager we specify when assigning it. And then they review it and either approve or reject it.

Answer:

Yes, such a scenario is possible. These are open-ended questions in the tests. When creating an open-ended question, select Checker
Test can be from one open question.
Accordingly, the course first inserts a video module, followed by a module with a test consisting of one open-ended question.
Course Creation and Settings

1. To add a Course, open Catalog of courses. Click on the plus "Add". The "Add" element is available only to LMS moderators.

Mandatory fields when creating a course:

  • Course Title.
  • Course objective.
  • Duration. This field is mandatory but is automatically populated when modules are added to Course.
  • Program. Program Textual Description.
  • Program course. In the form of modules from tests, lessons, materials. It is necessary to add at least one module (Lesson or Material) to Course. 

Do not enter special characters in the fields, such as the snowboarder emoji.

2. Settings and Various Nuances.

Image This is an image that will be displayed in the course card in the catalog and when the course is opened. 

Section catalog This is a filter for cases when there are many courses in the catalog. Catalogs are created in the Settings - Application Settings - Sections section.

Subject In this post, the Subject of the course is introduced. If you put a sign before a word #then it becomes a tag and can serve as an additional filter in the course catalog.

Select competence Two options are possible:

  1. When Competence is selected, to which not tied developmental activities in the competency module.
  2. When Competence is selected, to which attached developmental activities in the competency module.

In the first case, when adding a competency, it will serve as information. In the second case, the system will generate an individual development plan:

  • when activating the element "Generate IDP when not achieving the passing score",
  • if the passing score is not achieved in the tests.

Allow comments When activated, users will be able to add comments to the course card.

Issue Certificate Upon activation, the system will prompt you to select Certificate, which is pre-configured in the Settings - Application Settings - Certificates section. Upon successful course completion, the system will automatically generate Certificate and it will be available in the My Certificates section.

Feedback Form. При активации, после прохождения курса будет выведена анкета обратной связи. Анкету обратной связи (Feedback Form) можно настроить в разделе Настройки - Настройки приложения - Feedback Form.

Points In this case, it is not a pass-through Score, but a Score within the gamification system.

By Default for Completion course, points are awarded as set in the general application settings (Settings - Application Settings - Points). If nothing is set in the general settings and this specific setting, no points will be awarded. If you activate this element, the course will have individual point accrual.

When activated, the following options appear:
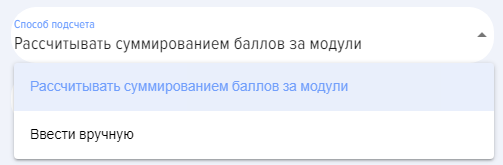
  • Calculate by summing points for modules. The application will calculate each module (Lesson and Test) and output the total Score for Course.
  • Enter manually - the number of points for Course is entered manually.
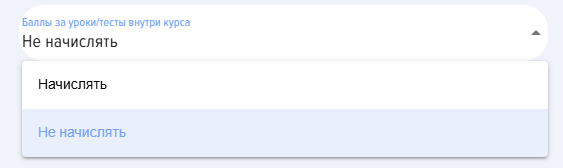
Award points for modules:

  • To accrue. That is, points will be accrued for Course and separately for each module. 
  • Do not accrue. Points will only be awarded for Course.

Hide in catalog. When Course is activated, it will be hidden from users in the catalog and cannot be self-assigned. Course will be available for assignment by a moderator. When Course is assigned, it will be displayed in the employee's personal account under the My Courses section.

For internal use only. When Course is activated, it will only be available to employees from selected departments. Activate and select a department from the structure.
image.png

Access to modules opening. 

image.png - Sequence module opening in the course. By Default uses the variant where access to all lessons/tests/materials in the course is opened immediately.

There are two additional options for sequential module opening:

  • The option where the next module opens regardless of the module completion status.
  • The option where the next module opens only upon successful completion of the previous module.

Time on the Completion course.  Course time on Completion is specified in minutes.

Maximum number of attempts. The maximum number of attempts to complete the course is specified. By Default is set to 0 - the number of attempts is unlimited. If attempts are exhausted, then when trying to complete Course, a message will be displayed indicating that the maximum number of attempts has been used. Attempt starts when the Start button is pressed.

Availability Period. When activated, the deadline for course availability is specified. If Availability Period have expired, then when attempting to take Course, a message will be displayed stating that Course does not fall within Availability Period.

Program course. To create a course directly, you need to drag modules from the sections: tests, lessons, or knowledge base. Find the desired one, grab it with the mouse, and drag it into the "Drag lessons and tests here" field. That is, the logic is as follows:

  • First, lessons, tests, or materials are created and published. Once they are published, they will appear in the lists on the right.
  • Then, from the created and published lessons, materials, and tests, the Course is formed.
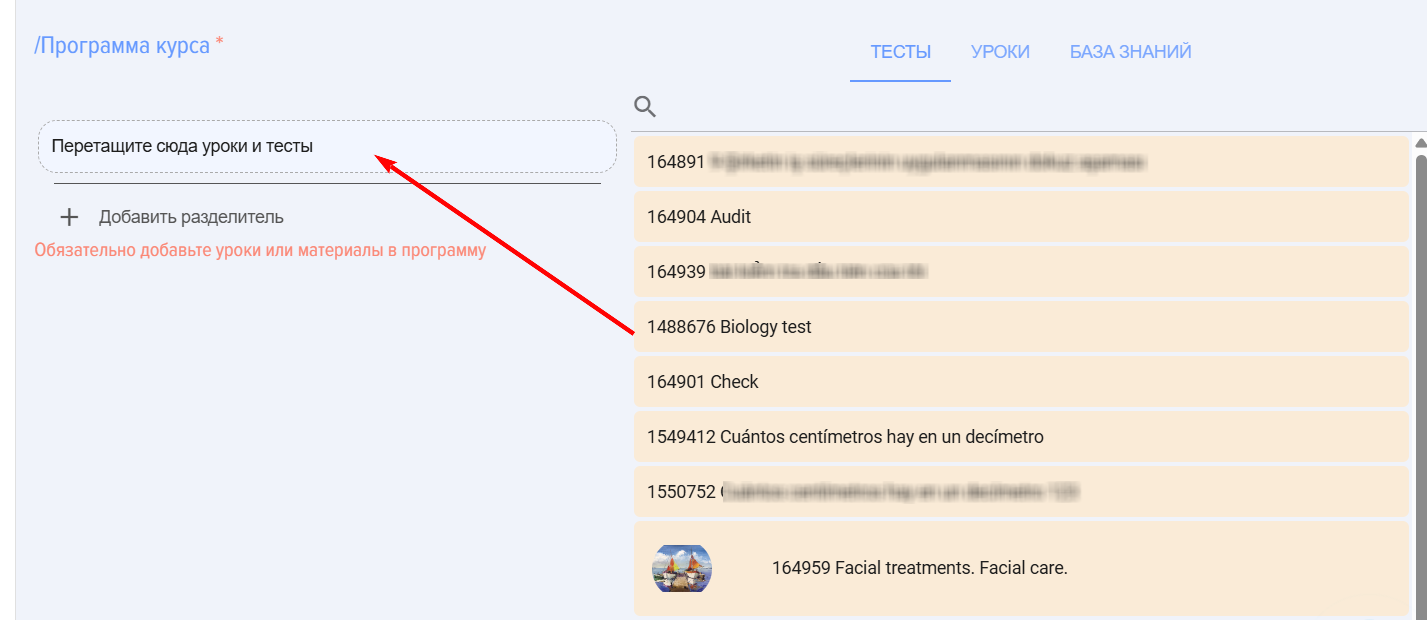
IMPORTANT! The lists of lessons, tests, and materials display published lessons, tests, and materials. from the same section which is set for the course.

IMPORTANT! If the catalog contains many lessons/tests/materials, start typing the name in the search bar. The application will find the required module and leave only it in the list, then you can move it to the field for program formation.

Course presentation: linear, tree-based

1. Course in the application can be represented as linear in the form of or in the form of trees.

2. Linear course representation.
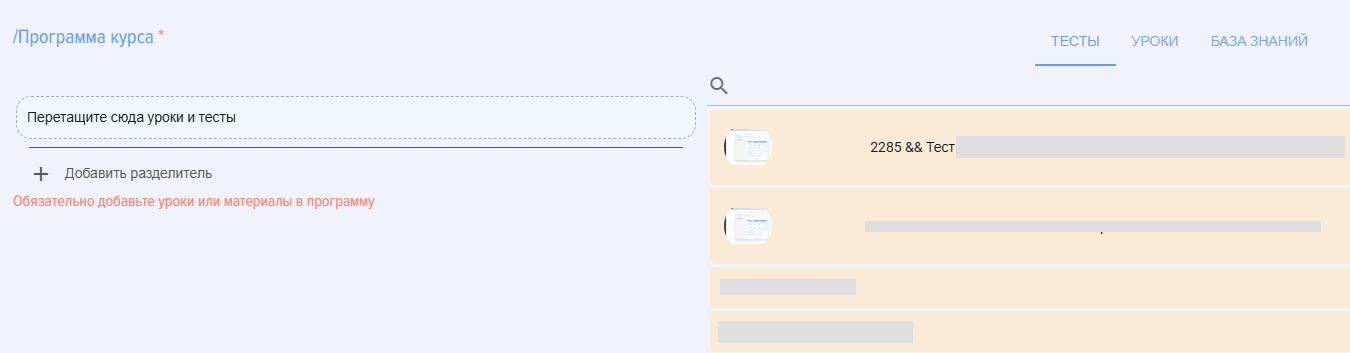
 - course constructor. Assemble Course by dragging and dropping lessons and tests.

How to assemble Course:

  • Find the required Lesson, Test. Use the search in the corresponding columns (in lessons, tests, materials).
  • Hover the mouse cursor over Lesson/Test/Material. Click the left mouse button.
  • Drag and drop into the "Program course" column and release. Ensure that Lesson/Test ends up in the "Program course" column.
  • Thus, drag and drop the required number of lessons, tests, and materials, and arrange them in the necessary order.

To change the module card color, click on the element 

To add a separator between modules (e.g., thematic blocks), click on the element 
To change the module name, click on the element. image.png enter new name  image.png Save.

3. Course representation as a tree.

3.1. Activate the tree view 

3.2. Stand on the "Program course"

A window for creating the course program will appear.

  • Drag lessons/tests/materials into the "Program course" zone, the "Drag lessons and tests here" field, and release. Ensure that Lesson/Test appeared in the "Program course" column.
  • Thus, drag and drop the required number of lessons and tests, and arrange them in the necessary order.

3.3. Separator If you need to create a sublevel, create a separator and add modules to it as well. 

Click on Add Separator

Open the course program and click on the added separator.
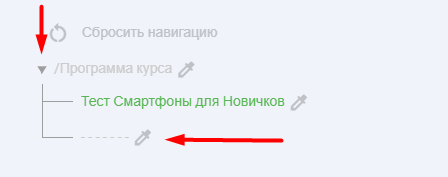
Edit the name of the Separator

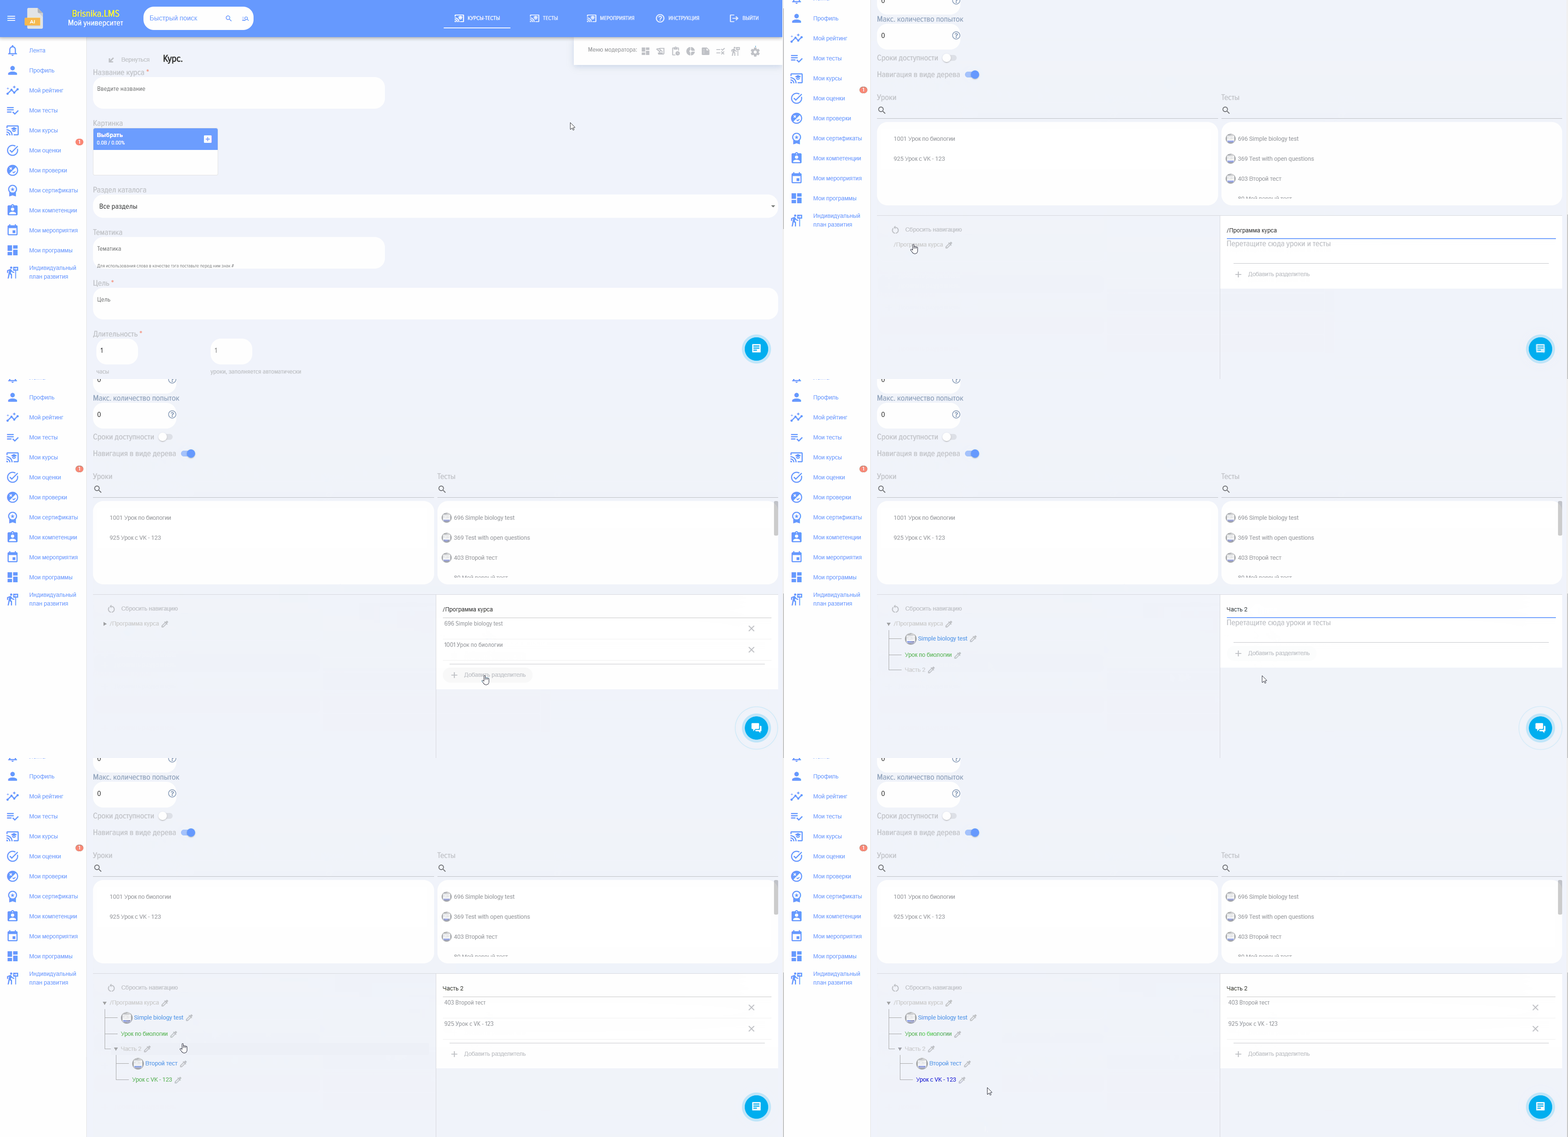
Then, stand on the separator (similar to the Course Program) and add modules.

Course in linear form appears as follows:
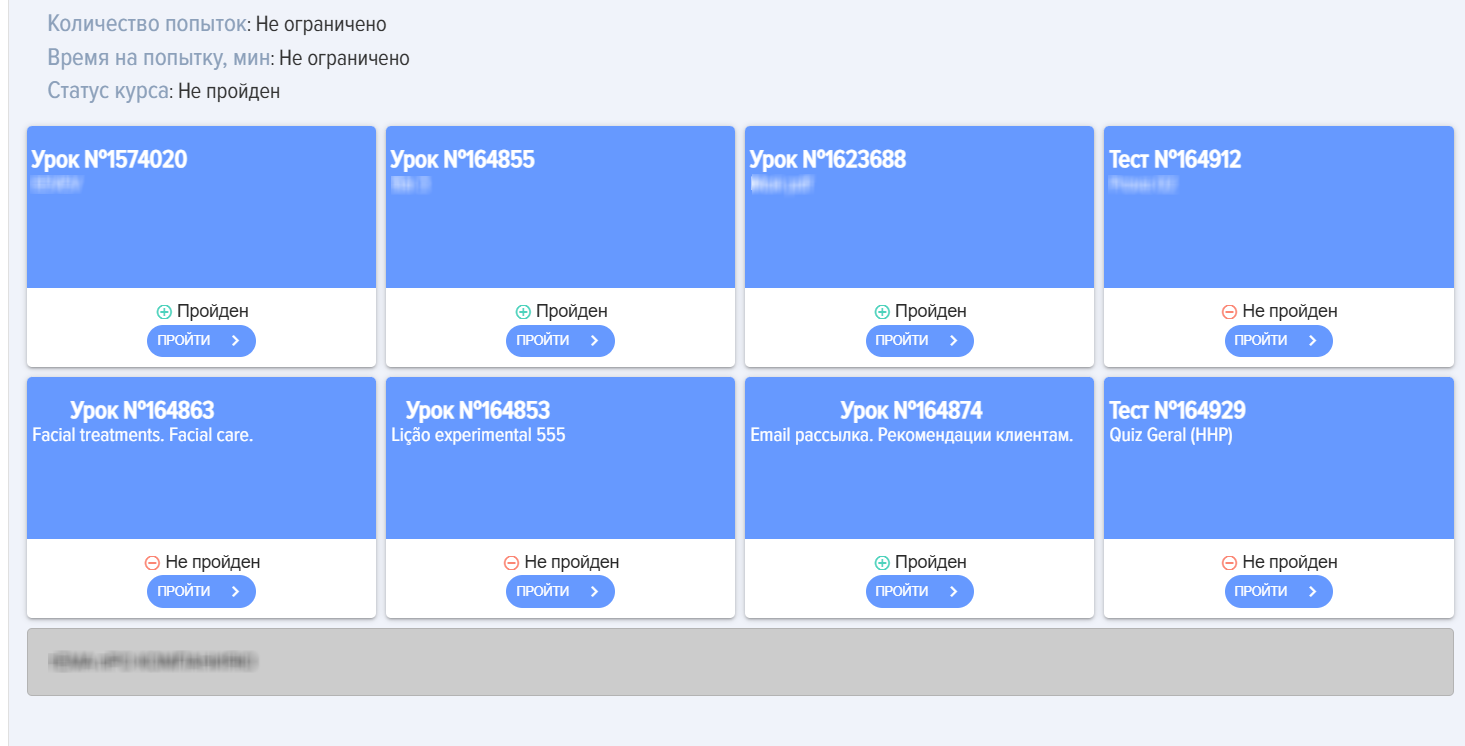
Course appears as a tree in the following way:
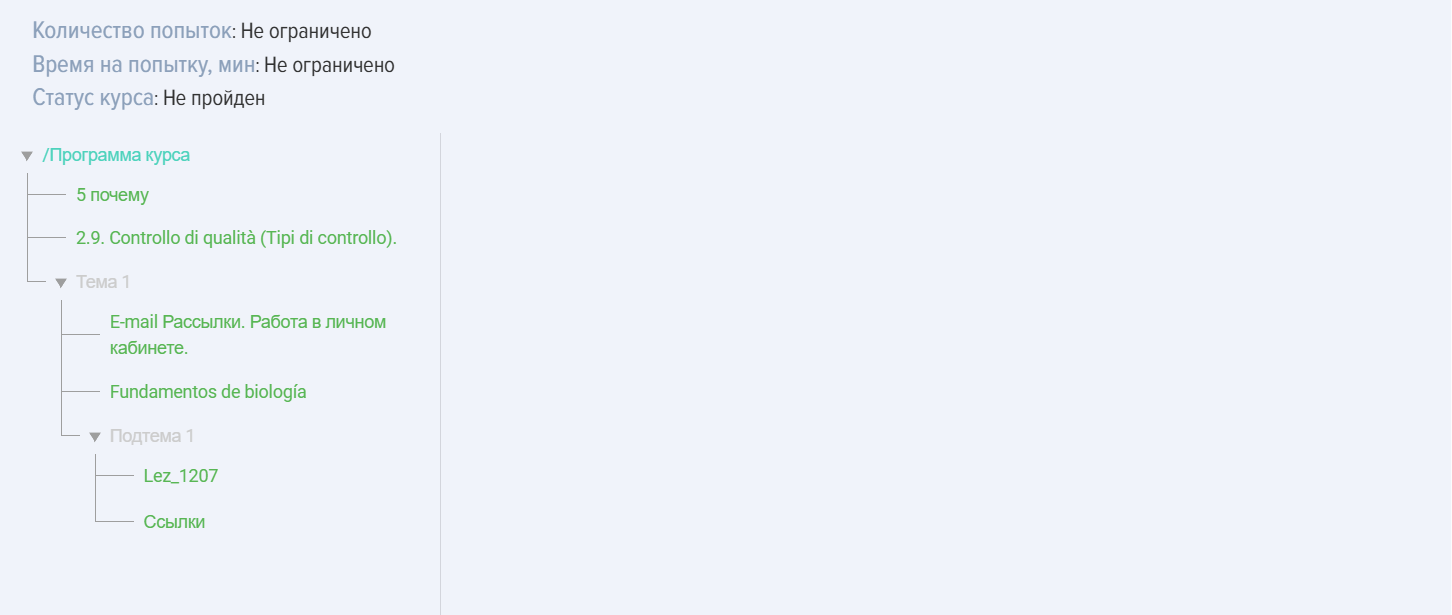
Course Actions

Course can be edited, deleted, copied, imported, exported:

  • Course is copied entirely. The word "_Copy" is added to the name. The copied Course is added to Catalog in the Draft status.
  • Course can be exported and imported in Excel or Udata format. Choice export/import format is configured in the Settings-Other-Export Format section.
  • When Course is deleted, it is permanently removed and cannot be restored.
Completion course

Features of course completion:

  • At each new course start, the system records a new one. attempt The number of course attempts may be unlimited (unless Restriction is specified). When generating reports, all attempts can be hidden.
  • To obtain the status for a lesson/material Passed It is absolutely necessary to press the button. Complete the module in the lesson or Acknowledged in the material. If you do not press the corresponding element, but close or proceed to the next module, then Status will remain Not Passed.
  • After completion of all modules with status Passed Course automatically receives Status Passed.
  • If Course is part of the program, it must be searched for in the programs.
  • If Course is assigned, it can be found in the My Courses/Assigned section. Once you start working on it, it will move to Section Completed or In Progress.
Course Statuses

Courses have the following statuses:

  • Status publications:
    • published;
    • draft (saved without publishing).
  • Passing statuses:
    • Not Started. Start button not pressed in the course.
    • In Progress. Start button pressed in the course, but not all modules are completed.
    • Passed. Passed - all modules completed. Tests with status "Passed" (successfully), all lessons/materials viewed (Complete or Acknowledged button pressed). If the Complete Module button in the lesson is not pressed, then Lesson Not Passed, if the Acknowledged element in the material is not pressed, then Material Not Passed.
    • Not Passed. Indicates that one of the modules Not Passed: Test, Lesson (the Complete button is not pressed), Material (the Acknowledged element is not pressed).
  • Statuses by Purpose:
    • Self-Enrollment - the employee clicked on Pass Learning,
    • appointed - appointed as the application moderator.

4.2. Course

Course is assembled from published lessons and/or tests. Even if it is necessary to provide materials in a single lesson, it is necessary to create Lesson, then based on one lesson Course.

Catalog courses are available to all employees. After publishing a course, it becomes available to all employees in the catalog (if Course and Catalog are not hidden). Course can be saved without publishing, then it will only be available to the moderator.

Course can be assembled from lessons, materials, and/or tests in any sequence.

You cannot create it solely from the test Course.

Question: Is it possible to create Course without testing?

Answer:

Yes, it is possible. A course can contain any combination of lessons, materials, and tests. Course cannot consist of only one test. Course can consist of a single lesson or a single material.

Question: Can a Course be created with only one test?

Answer:

No. Test can be published directly in the test catalog.

Question: Is it possible to grant course access to specific employees rather than the entire department?

Answer:

The following options are possible:

1. Hide Course in the catalog and assign it to specific employees. Only these employees will see it in their personal account in the My Courses section.

2. For Bitrix24. Create a group in Bitrix with these employees. Then link Course to the Bitrix group via the Section "Groups" application.

Question: Why can't I Publish Course?

Answer:
To Publish Course, it is necessary to:

  1. Specify the course name (this is a required field).

  2. Add at least one Lesson or Material.

⚠️ Note:

  • If special characters or emojis (such as the skateboard emoji 🛹) are used in the title or other fields, the system may not save Course or allow Publish.

Question: What is the difference between Course and a program?

Answer:


Course Program
Possible modules Lesson, Test, Material Lesson, Test, Material, Course, Event
Sequence walkthrough Sequential Completion per single module Sequential and parallel Completion. Stages and levels can be created for sequential completion of modules.

Question: Where can I view the course completion results?

Answer:

In Appendix 4, the following roles can view course completion results:

  • The moderator can view the results in the reports.
  • An employee who has completed Learning can view the results in their personal account under the My Courses section by expanding the corresponding Course, if such an option was provided when the course was created.
  • The supervisor of the trainee and the moderator with limited rights. In the left menu, the Reports tab. Build the corresponding reports.
Question: Course Finished, but the report shows that Course Not Passed.

Answer:

Check if all modules with the status "Passed" have been completed. Update the application in the Feed or via the Browser.

If all modules are in the passed status, but Course remains in the "Not Passed" status, please contact support.

Question: How to hide Course from users?

Answer:

All courses when published By Default are available to everyone for self-enrollment in the course catalog. Self-Assignment means an employee opens Course and completes it without being assigned by a moderator.

Each Course can be restricted in availability:

  • By adding it to the group (for Bitrix24 and if the feature is available), Course will only be accessible to group members.
  • Via settings during creation:
    • hide completely from all - hide in directory,
    • make available to specific departments,
    • Hide from extranet - for Bitrix24.

If Course is hidden via settings and assigned, those to whom it is assigned will see it through their Personal Account. All others will still not see it.

Question: Is it possible to grant access to a course/test to specific employees rather than the entire department?

Answer:

Currently not available, only for the department. This option is under development, and in the near future, it will be possible to grant access to a course or test to specific employees. To do this, when creating a course, you will need to specify the employees who will be granted access to the course/test.

Question: Why does Status not change for a course when an employee has completed it?

Answer:

Courses have the following statuses:

  • Status publications:
    • published;
    • draft (saved without publishing).
  • Passing statuses:
    • Not Started. Start button not pressed in the course.
    • In Progress. Start button pressed in the course, but not all modules are completed.
    • Passed. Passed - all modules completed. Tests with status "Passed" (successfully), all lessons/materials viewed (Complete or Acknowledged button pressed). If the Complete Module button in the lesson is not pressed, then Lesson Not Passed, if the Acknowledged element in the material is not pressed, then Material Not Passed.
    • Not Passed. Indicates that one of the modules Not Passed: Test, Lesson (the Complete button is not pressed), Material (the Acknowledged element is not pressed).
  • Statuses by Purpose:
    • Self-Enrollment - the employee clicked on Pass Learning,
    • appointed - appointed as the application moderator.

If Status of course Not Started or In Progress, it means that one of the modules within course Not Passed:

  • Not Passed Test;
  • Not Passed Lesson (Finish Module button pressed in the lesson);
  • Not Passed Material (the Acknowledged element in the material is pressed).

After successful completion of all modules Status, the course automatically changes to Passed. 

Question: Why can't employees see Catalog courses, Catalog tests, the knowledge base?

Answer:

If employees cannot see Catalog courses or Catalog tests or the knowledge base, while the moderator can see them, this means that the corresponding Catalog is hidden from employees in the settings.

Catalogs are hidden in the section: Settings (gear icon in the upper right) - Application Settings - More - Other tab.

Question: How is Course created and what can it consist of?

Answer:

Course in the Brusnika.LMS system can consist of lessons, tests, and materials in any quantity and sequence. When creating a course, the name, objective, duration (filled in automatically), textual description of the program are specified, and at least one module (Lesson or Material) is added. Course cannot consist of only one test; in this case, Test is published directly in the test catalog. Modules for the course are selected from published lessons, tests, and materials by dragging and dropping.

Answer: What are the main settings available when creating a course?

Answer:

When creating a course, numerous settings are available:

  • Image: Course card image.
  • Section catalog and Subject: For filtering courses. Subject can be marked as a tag using the "#" symbol.
  • Competencies: Can create an individual development plan if developmental activities are linked to the competency and the user has not achieved the passing score Score in the tests.
  • Comments and certificates: Allows users to leave comments and issues Certificate after successful completion.
  • Feedback Form (FF): Displayed after completing the course.
  • Points: Individual scoring for Course can be calculated by summing module scores or entered manually.
  • Hidden in catalog: Course may be hidden from public access but available by moderator assignment.
  • Availability by departments: Restriction access to the course for employees of selected departments.
  • Access to modules opening: Sequential or simultaneous module opening, with the possibility of a condition for successful completion of the previous module.
  • Time on Completion and number of attempts: Restriction by time and number of course completions.
  • Availability Period: Indication of the deadline until which Course is available.
Answer: What is the difference between linear and tree-like course representation?

Answer:

Course in the appendix Brusnika.LMS can be presented in two forms:

  • Linear representation: The course modules are arranged sequentially. Course is assembled by dragging lessons, tests, and materials in a specific order. You can change the color of module cards, add separators for thematic blocks, and edit module names.
  • Tree view: Allows creating a more complex structure with sub-levels. After activating this mode, you can drag modules into the "Program course" area and create dividers, inside which you can also add modules, forming a hierarchical structure.
Question: How to get Status "Passed" for a course and its modules?

Answer:

For Lesson or Material to receive the Status "Passed", it is mandatory to press the "Complete Module" button (for a lesson) or "Acknowledged" (for a material). If the user simply closes the module or proceeds to the next one without pressing the corresponding button, the Status will remain "Not Passed". After successfully completing all modules with the status "Passed" (including successful Completion tests), Course automatically receives the Status "Passed". Otherwise, if at least one module Not Passed, Course will have the Status "Not Passed".

Question: What statuses can a course have?

Courses have the following statuses:

  • Publication statuses:
    • Published: Course is available to users.
    • Draft: Course saved but not published.
  • Passing statuses:
    • Not Started: The "Start" button in the course was not pressed.
    • In Progress: Course started, but not all modules completed.
    • Passed: All modules have been successfully completed (tests, lessons with the "Complete" button clicked, materials with the "Acknowledged" button clicked).
    • Not Passed: One or more Not Passed modules.
  • Statuses by purpose:
    • Self-Enrollment: The employee independently selected Course for completion.
    • Appointed: Course was appointed as the application moderator.
Question: What is the key difference between a course and a program?

Answer:

Course may include lessons, tests, and materials, Completion which are delivered sequentially, module by module.

Program is a more complex entity and can include lessons, tests, materials, other courses, and even events. Completion programs can be either sequential or parallel, with the ability to create stages and levels to structure the learning process. That is, Program can combine several courses and other learning elements.

Question: How can I restrict access to a course to specific employees or departments?

Answer:

To restrict access to the course, the following options are available:

  1. Hide Course in catalog: Course will not be visible in the general self-registration catalog. It can be assigned to specific employees, and only they will see it in their personal account.
  2. For internal use only: When creating a course, you can select specific departments whose employees will have access to Course.
  3. Using Groups (for Bitrix24): Course can be linked to a specific group in Bitrix24, and it will only be accessible to members of that group.

It is important to note that currently it is not possible to grant access to the course to individual employees directly through the course settings, only through Assignment after hiding it in the catalog or through groups (if the functionality is available).

Question: Why does the Status course not change to "Passed" after its completion?

Answer:

If Course Finished, but its Status remains "Not Started" or "In Progress", this means that one or more modules within the course did not receive Status "Passed". To successfully complete each module, the following conditions must be met:

  • Test: Must be Passed successful.
  • Lesson: Press the "Complete Module" button.
  • Material: It is necessary to click the "Acknowledged" element in the material.

If these actions have not been performed for all modules, the Status of the course will not change to "Passed". In this case, it is recommended to check the statuses of all modules and ensure they are "Completed". If all modules are completed and the Status of the course is still Not Passed, it is recommended to update the application.

Question: When creating a course, program, or searching for a lesson/test, the system does not find it, even though Lesson/Test is published.

Answer:

Check if there is a space at the very beginning of the lesson/test name. Verify if the search data is entered correctly.

Question: How can I find out at which stage of the course the students are currently, what has been completed and what hasn't?

Answer:

To obtain detailed analytics on the completion status of each module, it is necessary to generate the "Module Completion Status" report."employees-courses".

image.png

1. Course creation

1.1. Introduction

1. Courses may consist of the following modules:

  • Lesson,
  • Test,
  • Material,
  • Survey.

In any quantity and any sequence.

Course cannot consist of a single test. If it is necessary to Publish a single Test, it can be published directly in the test catalog. Meanwhile, Course can consist of a single lesson or a single material.

2. The layout and Completion of the course are sequential. In the extended course creation settings, you can set conditions for opening modules.

3. Course can be part of a program. It will be located in the My Programs section or in the Program Catalog, within the program it has been added to.

Do not enter special characters in the fields, such as the snowboarder emoji.

1.2. Creating a Course with Nika.AI

Nika.AI Course Builder - This is an intelligent tool in the moderator's dashboard that allows creating the structure and content of training courses using artificial intelligence. The process is divided into four sequential steps, and a preview window is always available on the right side of the screen. "Nika.AI Context"where the AI assistant provides hints and confirms actions.

At the top of the interface, the neural network usage limits are displayed: the total limit, the amount of resources already used, and the remaining balance.

Step 1: Course Basics

At this stage, the fundamental parameters of the future training are determined.

  • Course titleFor example, "Effective B2B Sales".
  • Learning objectiveDescription of the specific business task that this Course must solve.
  • Target audiencedefinition of the group of employees for whom the Material is intended.

Step 2: Type and Competencies

The moderator configures the course's methodological framework.

  • Course typeChoice categories from the dropdown list.
  • CompetenciesChoice of existing skills from the company's competency model or adding new ones.
  • Learning outcomesdetailed elaboration of what an employee should Know, Be Able to, Apply after passing, as well as on which KPI This will have an impact.

Step 3: Format and Volume

Technical structure and content styling setup:

  • Parametersthe desired number of lessons and the time limit for Completion in minutes are specified.
  • Content formatsChoice types of modules that the AI should include in Course (Text, Video, Test, H5P/Interactive).
  • Writing styleChoice tone of the material from the dropdown list.

Step 4: Sources and Limitations

Final adjustments before generation:

  • LimitationsChoice course volume (Short, Medium, or Detailed).
  • Information sourcesAI can rely on internal system materials, external sources, or specific Uploaded filesthat can be attached here.
  • Additional instructionstext field for entering specific course requirements.

Generation result

After pressing the button "Generate Course" The system prepares the project. The preview window displays the finished course card with its title, objective, target audience, and list of competencies. The moderator can review the result, make edits, or refresh the generation if necessary.

Ready-made Course can be Publish in the Course Catalog. 

1.3. Quick Course Creation

Section "Quick Course Creation" The moderator's office is designed for the rapid assembly of educational content using only the basic settings. In this mode, the moderator can quickly define the learning structure and populate it with modules.

1. Main parameters and structure

The process begins with filling in the basic information on the constructor's main page:

  • Course titleText field for entering a title (e.g., "Fundamentals of Corporate Culture").
  • Program courseCentral area where the learning "skeleton" is formed.
  • Theme ManagementUsing the button "+ Add topic" The moderator can split Course into logical blocks. Each topic can be renamed or deleted using the trash can icon.

2. Filling the program with modules

At the bottom of the section, there are buttons for adding various educational elements in any quantity:

  • Adding lessonsWhen the button is pressed "+ Add Lesson" A modal window opens with two tabs:
    • ExistingSearch and add already created lessons in the system (e.g., SCORM packages or PDFs) via the "+" icon.
    • Create newallows you to quickly create a Lesson by specifying a name and selecting one of the content typesPDF, Longread, Video, SCORM, H5P, Files, or Links.
  • Adding testsWindow "Create a test" also offers two options:
    • ExistingChoice of ready tests from the general list.
    • Create newEntering the title and formulating questions. The system supports various types of questionsOne or more correct answers, Matching, Sequence, Open question or Substitution.
  • Adding materialsButton "+ Add Material" opens access to the Knowledge Base. The moderator can select the required one. "Shelf" (category, e.g., Shelf #1) and add a specific document or media file to Course.
  • Adding pollsAllows you to include feedback collection forms in the program by selecting them from the list of available ones.

3. Completion of creation

The interface provides quick actions in the upper right part of the screen:

  • PublishSaves all changes made and makes Course available in the system.
  • CancelAllows you to exit edit mode without saving the draft.

This tool minimizes the number of steps, allowing a moderator to assemble a complete Course, consisting of lessons, tests, and materials, on a single page.

1.4. Advanced Course Creation

Section "Advanced Course Creation" In the moderator's office, a complete set of tools is provided for the detailed configuration of the educational process. The creation process is divided into four sequential stages: "Basics", "Structure", "Settings", and "Check".

1. "Basics" Stage

At this step, the information base of the course is established:

  • Basic dataCourse Title (required field), Learning Objective (what the employee will learn), and Choice cover image from the gallery.
  • PlacementChoice of the catalog section where the Course will be published.
  • Additional parameters:
    • Tags and CompetenciesAssignment of thematic tags (via #) and Choice of developed competencies from the dropdown list.
    • DescriptionBrief course program annotation for students.
    • DurationThe planned completion time is indicated in hours; the number of lessons is calculated by the system automatically based on the added content.

Select competenceTwo options are possible:

  1. When Competence is selected, to which not tied developmental activities in the competency module.
  2. When Competence is selected, to which attached developmental activities in the competency module.

In the first case, when adding a competency, it will serve as information. In the second case, the system will generate an individual development plan:

  • when activating the element "Generate IDP when not achieving the passing score",
  • if the passing score is not achieved in the tests.

2. "Structure" Stage

The moderator creates a training program by adding topics and modules.

  • Navigation ModesYou can use standard theme addition or enable "Navigation in the form of a tree" for working with complex nested structures.
  • Course ElementsWhen the "tree" is enabled, a side panel opens with all available system elements (Lessons, Tests, Knowledge Base Materials) that can be dragged and dropped into the desired course sections.
  • ContentYou can add Lesson, Test, Material, or Survey to any topic using the corresponding buttons.

3. "Settings" Stage

Here, the rules for access and the conditions for completing the course are defined:

  • Access and AudienceOption to hide Course in the public catalog or from extranet users. "Restrict by departments" allows you to select specific company departments (e.g., IT) that will have access to Course.
  • Rules of passage:
    • FreeAll lessons are open immediately.
    • SequentialThe next module opens after the previous one is completed with any result.
    • Sequential (strict)Access to the next module is only granted upon successful completion of the previous one.
    • LimitsSetting the time limit for Completion (in minutes) and the maximum number of attempts.
  • Interaction and RewardsEnabling comments, configuring automatic issuance certificate according to the selected template and adding a feedback formFeedback Form).

Issue CertificateUpon activation, the system will prompt you to select a Certificate, which is configured in advance. Upon successful completion of the course, the system will automatically generate a Certificate, and it will be available in the My Certificates section.

Feedback Form. При активации Регулярного опроса, после прохождения курса будет выведена анкета обратной связи. Анкету обратной связи (Feedback Form) можно настроить в разделе Создание опроса - создать регулярный Survey, привязанный к курсу.

PointsIn this case, it is not a pass-through Score, but a Score within the gamification system.

By Default for Completion course, points are awarded as set in the general application settings (Settings - Application Settings - Points). If nothing is set in the general settings and this specific setting, no points will be awarded. If you activate this element, the course will have individual point accrual.

When activated, the following options appear:

  • Calculate by summing points for modules. The application will calculate each module (Lesson and Test) and output the total Score for Course.
  • Enter manually - the number of points for Course is entered manually.

Award points for modules:

  • To accrue. That is, points will be accrued for Course and separately for each module. 
  • Do not accrue. Points will only be awarded for Course.

Hide in catalog. When Course is activated, it will be hidden from users in the catalog and cannot be self-assigned. Course will be available for assignment by a moderator. When Course is assigned, it will be displayed in the employee's personal account under the My Courses section.

For internal use only. When Course is activated, it will only be available to employees from selected departments. Activate and select a department from the structure.

Time on the Completion course.  Course time on Completion is specified in minutes.

Maximum number of attempts. The maximum number of attempts to complete the course is specified. By Default is set to 0 - the number of attempts is unlimited. If attempts are exhausted, then when trying to complete Course, a message will be displayed indicating that the maximum number of attempts has been used. Attempt starts when the Start button is pressed.

Availability Period. When activated, the deadline for course availability is specified. If Availability Period have expired, then when attempting to take Course, a message will be displayed stating that Course does not fall within Availability Period.

4. Stage "Check"

Final screen where the moderator sees the summary of the created course.

  • Brief summary: name, Section, number of lessons, access and completion rules.
  • ActionsA moderator can "Save draft" for further work or press "Publish Course"to make it accessible to the intended audience.

IMPORTANT! The lists of lessons, tests, and materials display published lessons, tests, and materials. from the same section which is set for the course.

IMPORTANT! If the catalog contains many lessons/tests/materials/surveys, start typing the name in the search bar. The application will find the required module and leave only it in the list, then you can move it to the field for forming the program.

1.5. Importing a Course

Section "Import course" The moderator's office is designed for quickly uploading a ready-made course structure or educational package into the system. This automates the learning creation process without manually entering data.

Main features and functionality:

  • Supported FormatsThe system allows importing files in formats .XLSX (Excel) .JSON (Udata)Additionally, Section supports loading SCORM packages.
  • Working with a TemplateFor correct import of the structure via Excel, a button is provided at the top of the screen. "Download Excel template"The moderator can fill this file with data and upload it back into the system.
  • Loading mechanicsThe file can simply drag into the central area of the screen ("drag-and-drop") or select it on your computer by clicking the upload area.
  • Automatic publicationAt the bottom of the page, there is a toggle switch. "Publish immediately"If it is enabled, Course will become available to learners in the catalog immediately after the import is completed.
  • ManagementAfter selecting a file, the moderator can press the button "Upload" to start the process or "Cancel" to return to the previous menu.

This tool significantly saves time when transferring large volumes of educational data from other systems or when creating large batches of similar courses.

1.6. Course Actions

Course can be edited, deleted, copied, imported, exported (from the course catalog):

  • Course is copied entirely. The word "_Copy" is added to the name. The copied Course is added to Catalog in the Draft status.
  • Course can be exported and imported in Excel or Udata format. Choice export/import format is configured in the Settings-Other-Export Format section.
  • When Course is deleted, it is permanently removed and cannot be restored.

1.7. Completion course

Features of course completion:

  • At each new course start, the system records a new one. attemptThe number of course attempts may be unlimited (unless Restriction is specified). When generating reports, all attempts can be hidden.
  • To obtain the status for a lesson/material Passed It is absolutely necessary to press the button. Complete the module in the lesson or Acknowledged in the material. If you do not press the corresponding element, but close or proceed to the next module, then Status will remain Not Passed.
  • After completion of all modules with status Passed Course automatically receives Status Passed.
  • If Course is part of the program, it must be searched for in the programs.
  • If Course is assigned, it is located in the My Courses - Assigned section. After starting its completion, it will move to Section Completed or In Progress.

1.8. Course Statuses

Courses have the following statuses:

  • Status publications:
    • published;
    • draft (saved without publishing).
  • Passing statuses:
    • Not Started. Start button not pressed in the course.
    • In Progress. Start button pressed in the course, but not all modules are completed.
    • Passed. Passed - all modules completed. Tests with status "Passed" (successfully), all lessons/materials viewed (Complete or Acknowledged button pressed). If the Complete Module button in the lesson is not pressed, then Lesson Not Passed, if the Acknowledged element in the material is not pressed, then Material Not Passed.
    • Not Passed. Indicates that one of the modules Not Passed: Test, Lesson (the Complete button is not pressed), Material (the Acknowledged element is not pressed).
  • Statuses by Purpose:
    • Self-Enrollment - the employee clicked on Pass Learning,
    • appointed - appointed as the application moderator.

2. Test creation

2.1. Introduction

1. Tests in the application can be standalone or built-in In Course, training program, group (for Bitrix 24):

  • Independent - are displayed in the test catalog, in the personal account - in the My Tests section.
  • Built-in:
    • Embedded in Course, displayed in the course catalog and in the My Courses section within the course.
    • Built into the program, displayed in the program catalog and in the My Programs section within the program.
    • For Bitrix24. If Test is added to a Bitrix Group, they will be displayed in the user's My Groups section, inside the group. The catalog Test will be available only to members of this group.

2. VisibilityTests can have different visibility settings (specified during creation):

  • Hide in catalog. Test will be hidden in the catalog, but if assigned, it will be available in the My Tests section.
  • For units only. Test will be available to employees of selected units.

Availability Period. When this setting is activated, Test will be available in the catalog during the selected period.

3. Methods of addingTest can be added via the interface or by uploading an Excel file. The template for uploading can be downloaded by clicking on the Import element - Download sample xlsx file for import.

2.2. Creating a Test with Nika.AI

Introduction

Test-constructor Nika.AI - This is an intelligent tool in the moderator's dashboard, designed for the automatic generation of test questions based on provided educational materials or open sources on the internet. The test creation process consists of five sequential steps.

1. Key capabilities of the Nika.AI assistant in testing:

  • Creating a test from scratch, based on a free-form request;

  • Refactoring existing tests into the LMS test structure;

  • Creating tests based on uploaded materials.

Creating a test from scratch. Enter the topic, test name in the "Theme test" field, and Nika.AI will generate Test based on open data.

Reprocessingimport. If you have a ready-made Test in Word or Excel, you can use Nika.AI as a test import tool. Upload your Test in the "Sources" field, Nika will analyze it, process it, and present it in the Burson Marsteller LMS test template. 

Document-based creation. You can upload any document in Word or Excel format and write in the Theme field a task to create a test based on the uploaded document: Nika.AI will analyze the document, generate Test based on it, and present it in the Bursniki.LMS test template. 

It is recommended to upload documents not more than 5 MB andmore than 300,000 characters.

Large files:

  • increase the processing time;

  • do not guarantee the correctness of the analysis;

  • reduce the remaining tokens.

2. Automatic phrasing adaptationNika.AI automatically:

  • corrects errors in the text;

  • eliminates duplicate questions;

  • replaces duplicate answer options.

3. Quality of generated tests

Nika.AI uses a probabilistic text generation model. Therefore, every Test created, even from the same query, may differ.

4. Number of tokens per portalEach LMS system is allocated a free monthly limit of 10 thousand tokens. In the upper part of the interface, the moderator can track limits Neural Network Usage: Overall Limit, Resources Used, and Remaining Balance.

Estimated number of tokens consumed:

  • One Test with 10 multiple-choice questions = approximately 2 thousand tokens. Without analysis of uploaded documents.

  • Analysis of one uploaded document with a volume of ~15,000 characters (approximately 25 pages in 11pt Arial font) will require approximately ~2,000-3,000 tokens.

The limit resets monthly. Accumulation of free tokens does not occur.

5. Acquisition of tokens. Additional tokens can be purchased in the section My Plan - Nika.AI tokens.

6. Personal dataNika.AI does not store personal data.

7. Number of questions in the created test cannot be more than 20If you need a Test with a large number of questions, create several tests and combine them using Excel export: create Test - publish in the test catalog - export to Excel; the second Test in a similar manner; then combine both tests in Excel and add them to Catalog via Test Import.

Stages of test creation

Step 1: Topic Definition (What are we checking?) At the initial stage, the moderator sets the basic context for the AI:

  • Test namefor example, "Final Test on occupational safety".
  • Subject / DescriptionA brief explanation of what this Test is about and who its intended audience is.

Step 2: Knowledge Source The moderator selects Material, which Nika.AI will analyze to formulate questions. There are three available methods for transmitting information:

  • TextDirect insertion of regulation, article, or instruction text into the work field.
  • FileLoading a document in formats PDF, DOCX, or TXT (up to 10 MB in size).
  • LinkSpecifying the URL of a public page whose content the AI should process.

If a source is not added, open internet data is used. If added, the added sources are used as a priority.

Step 3: Test Parameters Setting up technical specifications and difficulty level for the upcoming test:

  • VolumeSetting the number of questions (from 1 to 20) and answer options for each of them.
  • RequirementsDefinition of the passing score (in percent).
  • DifficultyChoice difficulty level (e.g., "Low") from the dropdown list.

Step 4: Question Types The moderator marks the assignment formats that the AI should use during generation.

  • Choice (one or more correct answers).
  • Sequence.
  • Matching.
  • Open question.
  • Substitution (filling in the blanks in the text).

Working with Results (Test Editor)

After generation is complete, the moderator proceeds to Test EditorWhere can the final edit be made?

  • EditingYou can modify the text of any question, the task type, or the answer options, as well as manually mark the correct answers.
  • Manual additionAt the bottom of the list of questions, a panel is provided for independently adding a new question of any type.
  • Publicationusing the toggle "Publish Test" and buttons "Add to Catalog" Test is saved and becomes available in the system.

Auxiliary tools

Throughout the entire process, the moderator is assisted by:

  • Context Nika.AISidebar with a welcome message and generation status confirmation (e.g., "Test successfully generated!").
  • AI AssistantAn interactive chat in the lower right corner of the screen, through which you can give the neural network additional commands (for example, "Rewrite question 2 more simply").

Recommendation for writing a test creation query

If a general wording is used:

"Make Test on computer work"

AI is forced to guess the direction:

  • Windows?

  • Linux?

  • BIOS?

  • Safety?

  • office software?

  • networks?

This may lead to unwanted displacement.

Therefore, it is recommended to formulate the query as detailed as possible:

"Create a Test on PowerShell for beginners with emphasis on file operations and loops."

2.3. Quick Test Creation 

Section "Quick Test Creation" The moderator's office is designed for the most rapid assembly of test tasks, when only basic parameters need to be set: Title and List of Questions.

Main interface elements

1. Test name

  • At the top of the page, there is a mandatory field. "Test name"Where to enter the title (e.g., "Check Safety Knowledge").
  • The field has Restriction in terms of the number of characters. up to 255.

2. List of questions The central area of the screen is reserved for forming the question database. In the right part of this block's header, the following is displayed: total question counter in the test (e.g., "Total questions: 1").

Each Block question includes the following elements:

  • Question textField for entering the content of the task itself.
  • Question typeDropdown list for selecting the response mechanism. The system supports five types:
    • Choice (one or more options);
    • Matching;
    • Sequence;
    • Open;
    • Substitution.
  • Answer optionsFields for entering options (e.g., "Option 1", "Option 2"). To the left of each option is a checkbox to mark the correct answer.
  • Variant ManagementBelow the list of answers is a button "+ Add option" to expand the selection.
  • RemovalIn the upper right corner of each question block, there is a shopping cart icon for its quick removal from the test structure.

Process Management

  • Adding new tasksButton "+ Add question" at the bottom of the list allows adding new blocks to Test.
  • Storage and PublicationIn the upper right part of the screen, the moderator has access to two main buttons:
    • DraftTo save an intermediate result without immediate publication.
    • PublishFinal Action that makes Test available in the system for completion.

This tool minimizes the number of settings, allowing a moderator to assemble a functional Test on a single page without navigating through complex menus.

2.4. Advanced Test Creation

Section "Advanced Test Creation" The moderator's office is designed for detailed manual configuration of all aspects of testing: from visual design to complex question delivery logic and integration with the employee development system. The process is divided into four steps: "General," "Parameters," "Blocks," and "Questions."

Step 1. "GENERAL"

1. Here the basic test identifiers are set:

  • Basic informationRequired name (up to 255 characters), logo (Choice from the gallery), and a detailed description of the test's purpose (up to 1000 characters).
  • ClassificationChoice of the catalog section and topic indication (using words with the prefix # turns them into tags).
  • Methodological settings:
    • CompetenciesChoice of skills that this Test assesses.
    • Connection with IDPThe "Generate IDP on failure" option allows for the automatic assignment of a development plan if an employee fails the test.
    • Difficulty and TypeSetting the difficulty level and test classification (e.g., "Intermediate").

2. In test settings mandatory there are three fields (in addition to the need for the questions themselves):

  • Test Name (do not use special characters in names, such as the snowboarder emoji).
  • Time on Test.
  • Pass-through Score.

3. Field "Competence" and function "Generate IDP when failing to achieve the passing score".

Add competencies to the test with and without activating the "Generate IDP if passing score is not achieved" element.

Without activation. In this case, the competencies will serve as information only and will not provide any additional functionality.

With activation. Activation will only be possible if developmental activities have been assigned to the competency in the Settings - Competency Management section. If developmental activities are assigned and the user has not achieved the passing Score, the system will automatically generate a IDP, which will already include the developmental activities.

Step 2. "PARAMETERS"

1. At this stage, the technical conditions for passing and the rules for displaying results are configured:

  • Time and attemptsRestriction time for Test (in minutes), number of available attempts, and the interval between them in days. A visual timer for the learner is also included here.
  • Result and GamificationSetting the passing score (in %) and the number of XP points the user will receive upon success. You can configure the selection of random questions from a general pool (for example, "show 10 questions out of 50").
  • Additional functionsIncluding test comments, automatic issuance certificate according to the selected template and binding the feedback form (Feedback Form).
  • Display of resultsChoice of what the user will see after completion (nothing, only the result, their own answers, or answers with detailed feedback/comments).
  • Logic and Constraints:
    • Prohibition on returning to previous questions and changing the answer.
    • Shuffling questions and answers.
    • Hiding the test in the general catalog.
    • TargetingRestriction access for specific company departments and setting the test availability period via the calendar.

2. Enable comments. When activated, all users will be able to write comments on the test card.

3. Issue Certificate. Upon activation, it is necessary to select Certificate. Certificate is created in the Moderator - Application Settings - Certificates section. Upon successful completion of the test, the system will generate Certificate, which will be available to the test taker in the My Certificates section.

4. Feedback Form. При прохождении теста система откроет анкету тестируемому для заполнения.

7. Points. How many points to award for passing the test. This is not a passing Score, but part of the gamification system. 

8. Passing score. Calculated as a percentage, taking into account the weights of the questions if they are provided. 

9. Test Results. Four options are available for selection: 

  • Do not show answers. Test results will be available only to the application moderators.
  • display questions with scoring. The employee taking the test will see Correct or Incorrect given Answer. At the same time, they will not see the correct results (detailed breakdown). 
  • display questions, answers, score. The employee taking the test will see Correct or Incorrect given Answer. They will also see which answers contain errors and which answers are correct.
  • display Incorrect Answer immediately. The employee, when taking the test, will immediately see whether they answered correctly or incorrectly (the result will be highlighted). However, they will not see the correct answers.

By Default works with the first option "do not show answers". 

In the second and third options, the employee can view the test results in their personal account under the My Tests section by clicking on the corresponding Test. The "Test Results" element will be available in the test. 

Step 3. "BLOCKS"

1. Using the "Blocks" functionality, you can create thematic blocks and then activate or deactivate them depending on testing tasks.

For example, a database of 100 questions is created, consisting of 10 thematic blocks with 10 questions each. Subsequently, some blocks are activated while others are deactivated. The application will present the test-taker with questions only from the active blocks. 

2. This functionality is convenient in situations where it is necessary to create a large question database and then, depending on the tasks, conduct testing not on the entire list of topics, but on specific topics.

3. The general workflow for working with blocks is as follows:

  1. Thematic blocks are activated. A tab for creating thematic blocks appears.
  2. Thematic blocks are created in the "Blocks" tab. Only the name of the new block needs to be specified. 
  3. When creating questions, each question is linked to a specific thematic block.
  4. Next, when assigning the test, the required blocks are activated, and the unnecessary ones are deactivated.
  5. The system will present the test taker with questions only from active blocks.

Step 4. "QUESTIONS"

Final stage of content population:

  • Weight of questionsThe moderator can enable the "Use Weights" function so that different questions carry different point values.
  • Question constructorWhen you click "+ Add Question", a modal window with an advanced text editor opens.
    • Type and BlockChoice mechanics of the question and its belonging to the previously created thematic block.
    • FormattingThe editor supports inserting files, links, tables, and text formatting.
    • Feedbackability to set custom messages that the user will see for correct or incorrect answers.
    • Optionsmanual addition of answers with marking correct ones.

The weight of the matter

By Default All questions have the same weight equal to one. The weights are then recalculated based on the number of questions entered. That is, if there is one question in the test, its weight will be 1 or 100%. If there are two questions in the test, the weight of each will be: 0.5 or 1 / 2 * 100 = 50%. If there are 8 questions in the test, the weight of each will be: 

  • The sum of weights of all questions = 1 + 1 + 1 + 1 + 1 + 1 + 1 + 1 = 8
  • The weight of one question will be: 1 / 8 * 100 = 12.5%

Weight of specific question / Total sum of weights * 100

The application allows you to assign an arbitrary weight to any question. To do this, enter an integer in the special field, and the system will convert the weights of all questions into percentages using the formula above.

Example. Test of 8 questions. Let's assign a weight of 7 to the last question, 3 to the first question, and leave the rest blank. Let's calculate the question weights.

The sum of weights of all questions = 3 + 1 + 1 + 1 + 1 + 1 + 1 + 7 = 16

The weight of the first question will be:

3 / 16 * 100 = 18.75%

The weight of the last question will be:

7 / 16 * 100 = 43.75%

The weight of each of the remaining questions will be:

1 / 16 * 100 = 6.25%

Checking (should equal 100%): 18.75 + 6.25 + 6.25 + 6.25 + 6.25 + 6.25 + 6.25 + 43.75 = 100%

The pass score Score is calculated taking into account the weighting coefficients of all questions.

In the example above, if we set the passing threshold Score to 42%, let's consider different scenarios:

  • The first seven questions are correct, the last one is incorrect, so the score will be 56.25%, Test Passed. 
  • Last one correct, all others incorrect, scored 43.75%, Test Passed.

Note that percentages are rounded on the screen, but not in calculations and formulas.

ManagementAt any time, the moderator can save the work as "Draft" or immediately "Publish" Test for the intended audience. Navigation is performed using the "Next", "Back", and "Save Test" buttons at the bottom of the screen.

2.5. Test Import

Section "Import test" The moderator's office is designed for mass and automated uploading of test questions from external files, which significantly speeds up the process of creating assessment materials.

Main functional capabilities and interface:

  • Supported FormatsThe system supports data import from files in the following formats: .XLSX (Excel) .JSON (Udata).
  • Working with a TemplateTo ensure correct data structure, a button is located in the upper right corner. "Download Excel template"The moderator can fill out this file according to the established template and upload it back into the system.
  • Loading mechanicsFiles can be added to the system in two ways:
    • Drag and drop ("drag-and-drop") directly into the central area of the screen.
    • By clicking on the upload area to file selection via the computer's file explorer.
  • Automatic publicationA toggle switch is provided at the bottom of the window. "Publish immediately"Upon its activation, Test will become available to learners instantly after the import process is completed.
  • ManagementAfter selecting the appropriate file, you must click the button. "Upload" to start data processing or the button "Cancel" to return to the previous menu.

This tool enables efficient migration of large volumes of test tasks from external systems or archives without the need for manual entry of each question.

2.6. Test Actions

1. Tests in the application can:

  • Create, edit - only by the application moderator.
  • Copy, delete, import, export - application moderator only.
  • Pass through - any employee.

2. Creating and Editing a Test. For creation test click on the plus sign add in the test catalog and sequentially fill in the tabs:

  • Test setup;
  • Test questions;
  • Blocks (when activated).

For editing test press on Edit element in test card.

3. Copying, Deleting, Importing, Exporting a Test. 

For copying test click on the element copy in test cardTest will be copied and appear in the directory with the name Copy. Test will be in the Draft status.

For deletion test click on the element Delete in test cardTest will be permanently deleted.

Import testThe Test can be imported in the test directory by clicking on the Import element. The Test can be imported in two formats: UDATA and Excel. The format is selected in the application settings: Settings - Application Settings - Other - Export Format.

Import in format UDATAThis format is used for backing up tests or migrating them from one portal to another. 

Import in format ExcelConvenient to use when creating large question databases. Download the test template for import "Download sample xlsx file for import". Prepare your question database in it and import.

Export testTo export, click on the element export Hello! How can I assist you today? test cardTest will be exported in the format specified in the settings (UDATA or Excel).

2.7. Test Statuses

Tests have the following statuses:

  • Status publications: publisheddraft (unsaved, not published). 
  • Passing statuses: Not Started; In Progress (when expecting review of open questions); PassedNot Passed.
  • Statuses by purpose: Self-Enrollment - the employee clicked on Take the test, appointed - appointed as the application moderator.

3. Creating Surveys

3.1. Introduction

Polls are designed to conduct surveys on various topics. Unlike tests, polls do not have right or wrong answers.

Methods of creating a survey

Upon entering Section, the moderator has access to three main methods.:
  • Create from scratchfully manual configuration of an empty form.
  • ImportAutomatic survey draft creation from uploaded file (supported formats include Word, PDF, Excel и PowerPointAttention! Nika.AI tokens are in use.
  • Create with Nika.AIAn intelligent assistant can generate questions based on a textual description of a task (e.g., "Survey on food quality") or based on ready-made topics: Engagement, Adaptation, Assessment of learning, Team climate.

3.2. HR Templates

Section "HR Templates" (in the "Form Creation" menu) provides the moderator with access to a library of pre-configured surveys with ready-made structure and analytics. These templates cover key aspects of personnel management and allow launching a professional study in just a few clicks.

Main features of working with templates

  • SearchOn the right side of the section, there is a "Search templates..." bar for quickly finding the required form using keywords.
  • PreviewWhen selecting any template, the "Template Preview" window opens, where the moderator can examine the survey structure, the order of sections, and the types of questions (for example, "Department" with a short text input field).
  • EditingThe "Edit" button in the preview window allows you to adapt the template to your company's specifics by modifying questions or settings.
  • PublicationThe "Publish in Catalog" button allows you to instantly launch Survey if no edits are required.

Complete list of available templates by category

1. Engagement Patterns:

  • Survey employee engagement
  • Pulse-Survey of Engagement
  • Survey Employee Satisfaction
  • Survey eNPS
  • Survey Workplace Happiness Level

2. Climate and Culture:

  • Survey of organizational climate
  • Survey corporate culture
  • Survey trust in management
  • Survey psychological safety
  • Survey of inclusivity and diversity

3. Wellbeing and Workload:

  • Survey employee well-being
  • Survey burnout risk
  • Survey workload
  • Survey work-life balance
  • Survey stress level

4. Onboarding and Adaptation:

  • Survey new employee experience
  • Feedback for the first week
  • Survey for the first month
  • Survey onboarding satisfaction
  • Feedback on the results of the probationary period

5. Assessment training:

  • Training Feedback
  • Assessment course
  • Assessment trainers
  • Survey Learning Effectiveness
  • Survey learning experience

6. Performance and Development:

  • Self-assessment of effectiveness
  • Assessment efficiency by the manager
  • Feedback from colleagues
  • Survey 360 degrees
  • Assessment of competencies

7. Employee Lifecycle:

  • Stay interview
  • Exit interview
  • Survey internal mobility
  • Feedback on promotion

8. Ideas and Improvements:

  • Employee Suggestion Form
  • Survey innovative ideas
  • Anonymous feedback form

3.3. Creating from Scratch

Section "Create from scratch" The moderator's office is designed for manual construction of surveys and questionnaires of any complexity. The creation process is divided into three sequential stages: "Metadata", "Question Input", and "Settings".

1. "Metadata" Stage

In the first step, the moderator fills in the basic information about the form:

  • Form name: обязательный заголовок анкеты.
  • Form typeChoice categories from the dropdown list (e.g., "Survey", "Feedback", "Assessment", "Request"). There are no differences between the types.
  • Descriptiontext field for entering survey objectives or instructions for respondents.

2. "Question Input" Stage

Модератор формирует структуру анкеты, используя систему разделов и разнообразные типы полей:

  • GroupingQuestions can be grouped into logical blocks (for example, "Section 1") using the "Add Section" button. An optional description can be added for each section.
  • Question constructorFor each task, the question text is entered and the answer mechanics are configured. Using the toggle switch. "Mandatory" It is possible to prevent the completion of a survey without answering a specific question.
  • Question TypesThe system supports a wide range of formats:
    • ChoiceSingle choice, Yes/No, Likert scale, Matrix.
    • ScalesScale 0-10, NPS 0-10.
    • Text and numericShort text, Long text, Number, Date.
    • AttachmentsUpload capability File respondent.

3. "Settings" Stage

At the final stage, the rules for conducting the survey and access to the results are determined.

  • Anonymity level:
    • OrdinaryRespondent data is visible only to the moderator.
    • PublicThe responses of all participants are visible to all users.
    • AnonymousInformation about who left Answer is completely concealed.
  • AudienceSurvey can be done "Accessible to all" employees or configure targeting by selecting specific individuals, sub-accounts, or groups of sub-accounts.
  • Passage parameters:
    • Allow multiple submissions and editing of responses after submission.
    • Option "Show results in card" (button "Results" for students).
    • Installation time constraints in minutes.
  • RegularityFunction "Regular Survey" allows you to configure automatic repetition of surveys for linked objects: courses, tests, events, programs, or knowledge base materials. This feature is used instead of Feedback Forms.

Management and Publishing

At the top of the interface, buttons for operational process control are always available: "Edit", "Preview" I "Save" (in draft). When the button is pressed "Publish" The system requests final confirmation, after which Survey becomes available to the selected participants.

3.4. Importing a Survey

Section "Importing a survey from Nika.AI" (находится в меню "Создание опроса" - "Импортировать") представляет собой интеллектуальный инструмент для автоматизированного создания анкет на основе готовых документов.

Main features and formats

  • Automatic generationThe moderator does not need to enter questions manually - the smart assistant Nika.AI analyzes the content of the uploaded file and independently drafts the survey.
  • Wide file supportThe system supports working with four main document types:
    • Word (DOC);
    • PDF;
    • Excel (XLS);
    • PowerPoint (PPT).

Work process

  1. LoadingTo initiate the process, press the button. "Choose file" in the center of the screen and select the corresponding document on the computer.
  2. ProcessingAfter loading, the neural network proceeds to analyze the text and create the question structure.

AI Usage Control

In the upper right part of the interface, current data on Nika.AI resource usage limits are displayed, allowing the moderator to plan their work:

  • Limittotal available generations;
  • Usedthe amount of resources already spent;
  • RemainingCurrent balance for creating new surveys.

For convenient navigation, a button is provided in the upper left corner. "Back" to return to the form creation method selection.

3.5. Creating a Survey with Nika.AI

Survey-constructor Nika.AI - This is an intelligent tool in the moderator's dashboard, designed for the automatic generation of questionnaire questions based on a user's text request. The process is implemented as a step-by-step "AI Creation Wizard," which allows for precise configuration of the topic, tone, and structure of the future survey.

At the top of the interface, the current limits Neural network usage: total limit, number of generations already used, and remaining balance.

Stages of survey generation

Step 1: Subject polling The moderator describes a task for the AI in free form (e.g., "Survey regarding the quality of catering in the office"). To simplify the work, quick-select buttons for popular HR topics are provided.

  • + Engagement;
  • + Adaptation;
  • + Assessment training;
  • + Team climate.

Step 2: Survey Tone Choice style of presentation to be used by the AI when formulating questions:

  • Officialfor serious corporate research;
  • Friendlyfor internal team surveys;
  • Briefminimum questions, maximum substance.

Step 3: Target Audience Definition of the target audience for content adaptation.

  • All employees;
  • Only managers;
  • New employees;
  • A specific department.

Step 4: Technical Parameters and Question Types Настройка структуры анкеты:

  • QuantitySpecify the exact number of questions to be generated (e.g., 5).
  • Question TypesThe moderator marks the required answer mechanics with checkmarks. The system supports:
    • Choiceone option, multiple options, Yes/No, dropdown list;
    • Scales1-5, 0-10, NPS 0-10, Likert Scale;
    • Text and numericshort text, long text, number, date;
    • Complexmatrix and file upload.

Generation completed

At the bottom of the wizard, a field is provided "Additional wishes"Where can I specify specific requirements (for example, "add a question about satisfaction with the manager"). After clicking the button "Generate Survey" AI prepares a draft form based on all specified parameters.

To cancel actions or return to previous steps, use the buttons. "Back" and an arrow icon in the upper left corner.

3.6. Survey Results

1. The survey results can be viewed within the survey itself.

2. In the "Moderator - Learning Management - Reports" section, you can generate a report with the results of all surveys for a specified period.

4. Creating Activities

4.1. Introduction

Section "Create Activity" The moderator's office is designed for planning, organizing, and tracking educational events or setting specific tasks. The system allows for flexible parameter configuration depending on the selected type of activity.

The "Events" module is designed for planning, organizing, and tracking educational activities. For example, attending a conference, an in-person training session, a meeting with a mentor, etc.

Main features of the module:

  • Creating events, sending invitations to participants.
  • Call for participation applications, confirmation of participation, monitoring of participant numbers.
  • Collection of feedback forms following the event.

The "Tasks" module is designed for designing various educational tasks, as well as tasks related to educational trajectories.

Activity can be added to a Program. In this case, the activity will be located within Programs.

4.2. Creating Activities

1. General Information

At the initial stage, the moderator fills in the basic fields common to all activity types:

  • TitleMandatory heading (e.g., "Q2 Strategy Session").
  • Descriptiontext field for entering activity details and specifics.
  • Activity typeChoice between two formats - Event or Task.

2. Creating an activity of type "Event"

If "Event" is selected, advanced configuration blocks open:

Event details:

  • DeadlinesSetting the exact time Beginnings (required) and Endings through the calendar and time selector.
  • Type and KindClassification of the event as Internal or Externalas well as Choice of a specific type (e.g., "Webinar") with the ability to add new types via the "+" button.

Participants and Organizers:

  • Rolesinstruction Organizer (name or department) and Choice Responsible employee from the list.
  • AudienceAdding participants individuallyAdd employees) or in whole groups (Add subdivision).
  • Limitsfield "Max. participants" allows limiting the number of entries (a value of "0" means no limit).

Settings and Formatting:

  • VisualizationChoice Event colors I Text colors for display in the calendar.
  • Communicationstoggle switch "Send invitations" opens the field for entering the notification text that participants will receive.
  • Feedbackability to bind feedback form for gathering feedback after completion.

3. Creating an activity of type "Task"

When selecting the "Task" type, the interface switches to configuring execution parameters:

  • Task parametersinstallation Deadline (deadline).
  • ChecklistCreating a list of specific actions. The moderator enters the item text and clicks. "Add".
  • Filesability to attach supporting documents by selecting them from media libraries systems.

4. Additional Settings (General)

For both types of activities, final parameters are available:

  • IntegrationChoice specific Bitrix24 calendar, into which the activity will be synchronized. For Bitrix24 only.
  • Visibilitytoggle switch "Visibility in the catalog" allows hiding activity from public search or making it public.

After filling in all fields, the moderator can proceed to publicationsso that the activity is displayed in the employees' personal account in the section "My Events".

4.3. Participation in the event, Event in the Personal Account, in the calendar

1. To participate in an event, the employee selects Event from the Event Catalog and submits an application by clicking on the Submit Application for Event Participation element.

2. After confirmation by the moderator (the moderator has edit mode, with a list of applicants on the right), the employee will be added to the list of participants.

3. After moderator approval, the event will appear in the employee's personal account and calendar (for Bitrix 24).

4.3. Activity Reports

1. Based on participation in events and task completion, reports can be generated in the Reports section.

2. If a feedback form was added to the event, reports can be generated based on the feedback forms.

4.4. Event Statuses

Events have the following statuses:

  • Published.
  • Not published.

Measures