
Demo, transfer, delete
Demo
1. Section Demo allows you to install or remove demo data.
2. The demo data includes:
- Lessons on working with the system;
- Test based on system operation lessons;
- Course Welcome to the lesson and test base for working with the system.
3. Also Course Welcome has been added as Material to the Knowledge Base on shelf Course welcome.
4. As an example, competencies and Rating Scale have been added to the competency management module.
5. Section is available only to application moderators and can be found at: Settings - Application Settings - Demo
Transfer
Introduction
1. Data can be transferred from any CRM/ERM to others, as well as from the version installed from the marketplace to the locally installed version.
2. All accumulated data, assignments, history, and statistics are transferred.
3. The data transfer service is paid. The current price is located in the Settings - Application Settings - My Plan - Support tab. Data Transfer service. The service is valid for one month, during which period you can transfer data an unlimited number of times.
Data migration
For direct transfer:
1. Purchase the data migration service.
2. There are two options for migration:
- Option 1. With one CRM/ERP- from one system to another or within the same system CRM/ERP- systems, but different addresses.
- Option 2. FOR BITRIX24 ONLY. From LMS version installed from marketplace to locally installed version.
3. Option 1.
- Install the LMS system into the target portal. It will be empty.
- Copy the key from the target system.
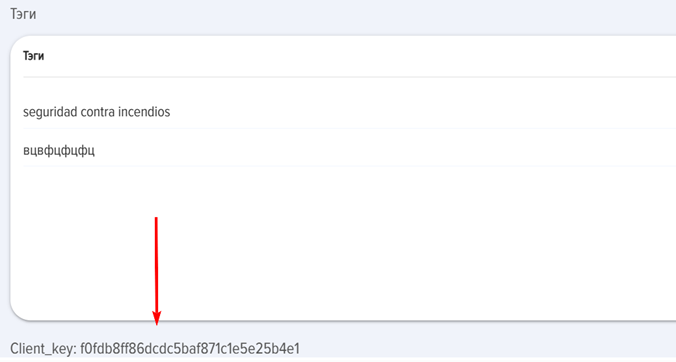
The key is located in the section Application Settings - Settings - Other at the very bottom.
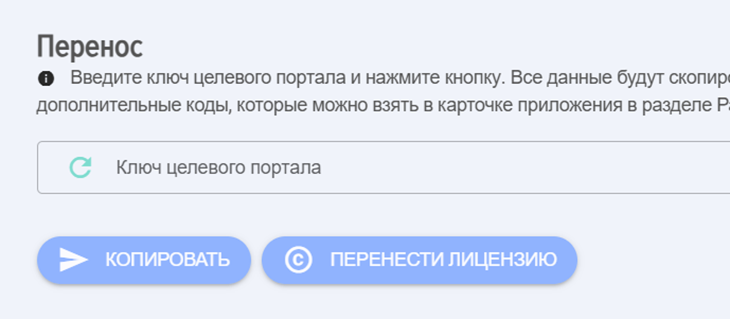
- Insert the key in the source system into Section Transfer data to this field:
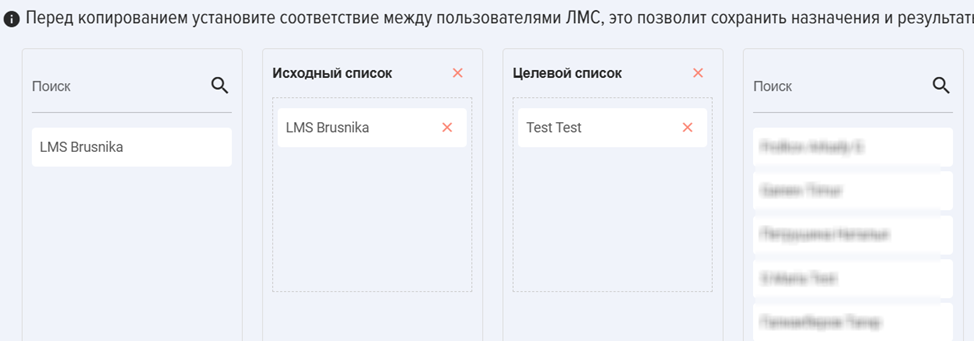
- When the key is entered, four columns appear below:
1) Users of the source portal
2) Column of matching source users
3) User Matching Column of the Target Portal
4) Users of the target portal.
Before starting the data migration (copying) process, it is necessary to establish Matching between users. To do this, drag and drop records from the columns.
1->2 and 4->3
And in columns 2 - 3 we install Matching users.
This is necessary so that the transferred data establishes Matching assignments, results, etc.
If this is not done, the migration will occur, but the user associations will be incorrect.
The established Matching is saved and automatically restored upon next login.
User requests occur when entering/changing a key.
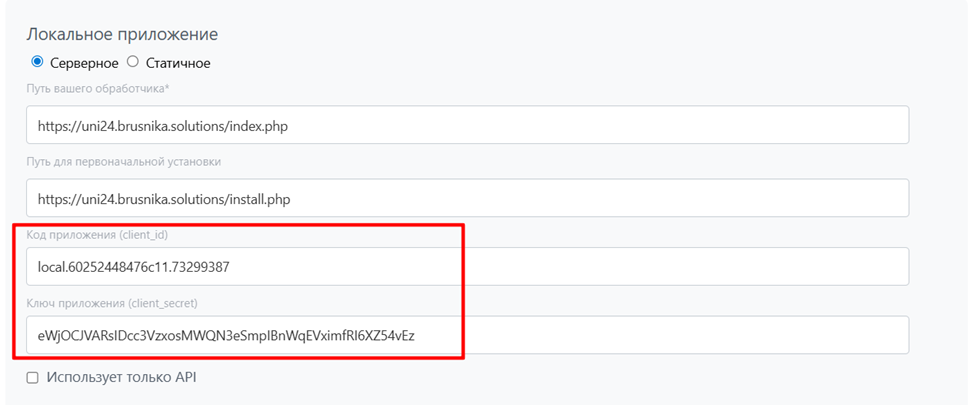
4. Option 2. All the same, only additionally it is necessary to enter the following codes:
To transfer to the local target LMS, additional keys will be required, which can be found in the application card under Developers - Integrations - Edit.
Example:
License transfer
Licenses are transferred separately. When licenses are migrated to the new LMS, they will be deactivated in the old one.
Therefore, the transfer process is divided into 2 stages:
- First, all data is migrated, and you ensure that everything has been transferred correctly.
- Then transfer the licenses.
Testing
Data can be transferred to the target portal an unlimited number of times; it will be overwritten. Meanwhile, data in the target LMS can be deleted. Data in the source LMS is not lost; nothing happens to it.
Removal
Section Deletion is used to remove data (statuses, tests, completion history, etc.) and files that were uploaded to lessons, knowledge base, etc.
Deletion
Section Deletion is used to remove data (statuses, tests, completion history, etc.) and files that were uploaded to lessons, knowledge base, etc.
Delete
The <b>Delete</b> Section is used to remove data (Statuses, Tests, Completion History, etc.) and files that were uploaded to Lessons, Knowledge Base, etc.