Application Settings
Rating and points
TThe overall work scheme is presented in the section "Gamification. General Mechanism".
Scores are a gamification element implemented to engage employees.
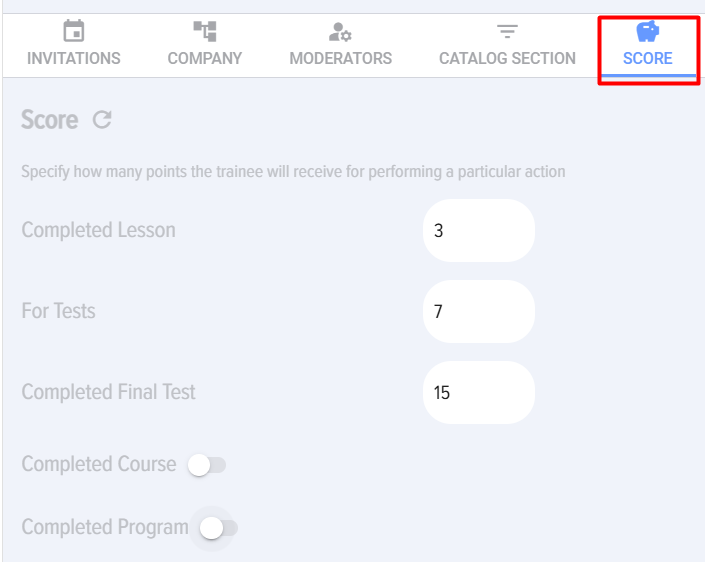
When activating "Completed Course", the following settings appear:
- Score calculation method. There are two options:
- By summing scores for modules. That is, the total score for the course will be equal to the sum of scores for all lessons and tests in the course.
- By manual entry. Scores are entered manually when creating the course. Regardless of the number of scores for each course and test inside the course, the manually entered number of scores will be awarded for the completed course.
- Awarding scores for modules:
- Do not award scores. Only scores for the course will be counted; scores for modules inside the course will not be awarded.
- Award scores. Scores will be awarded both for the course and for each module inside the course.
- Scores - how many scores will be awarded for the completed course.
Similar settings will appear when activating "Completed program".
Scores can also be assigned to the following actions in the application:

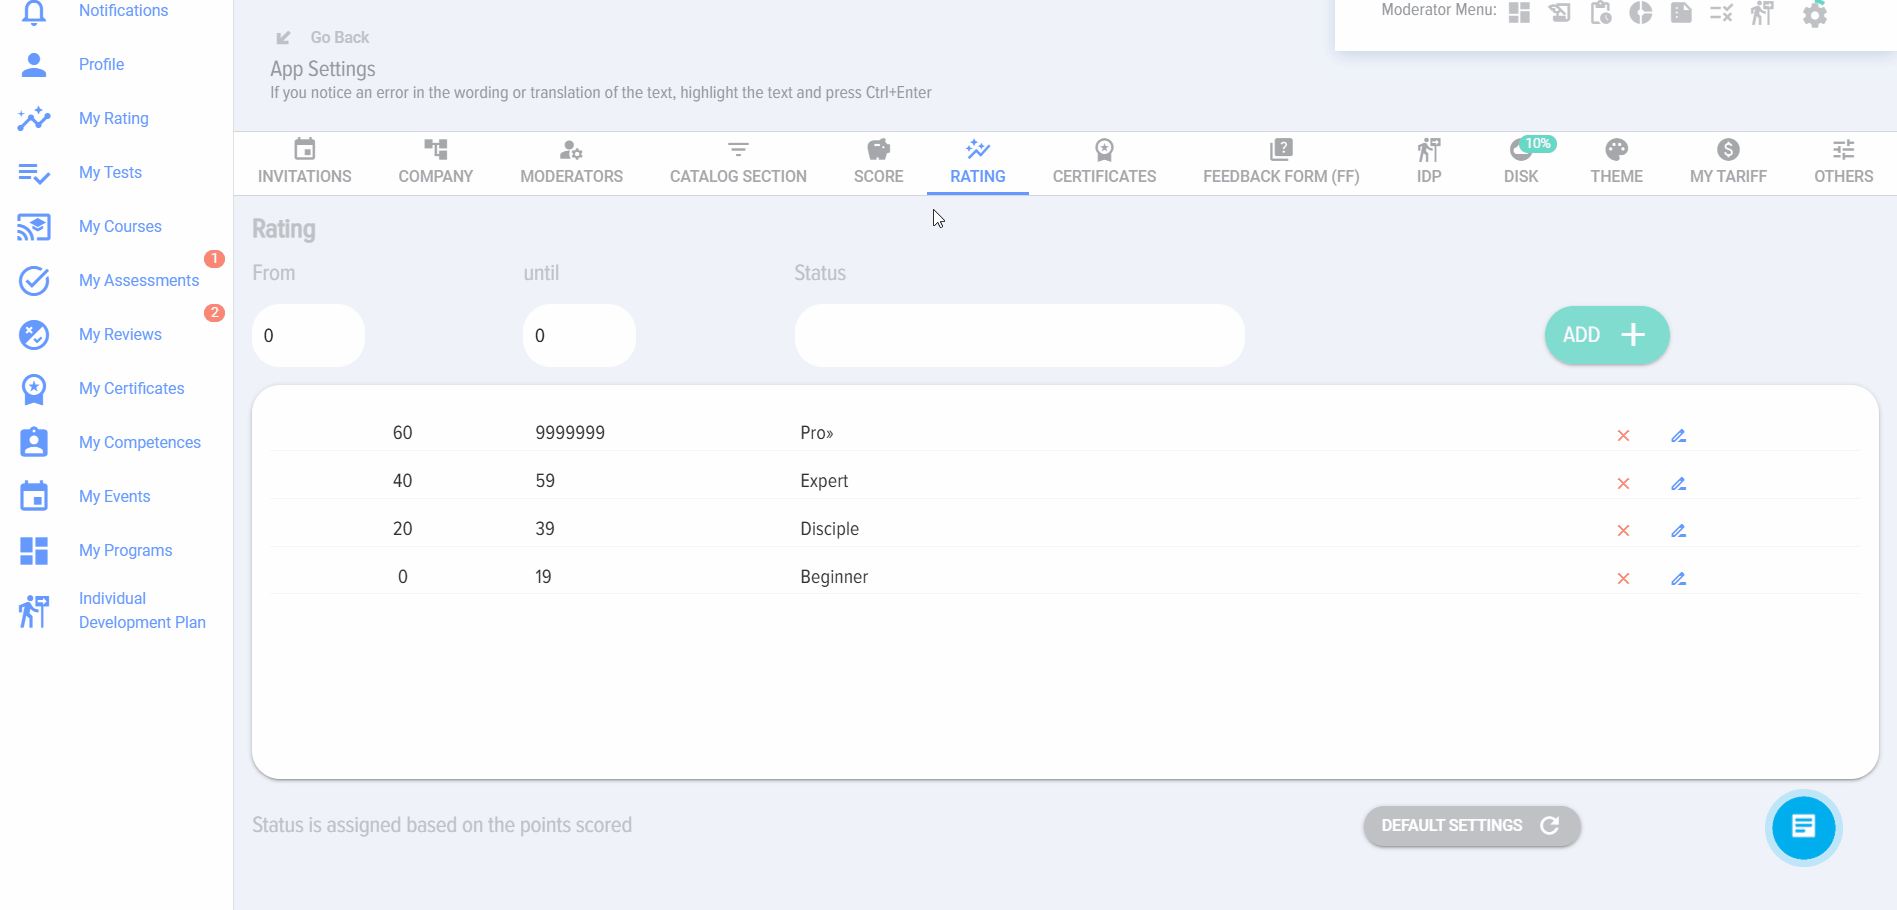
Ratings are the learner's status, displayed in their profile.
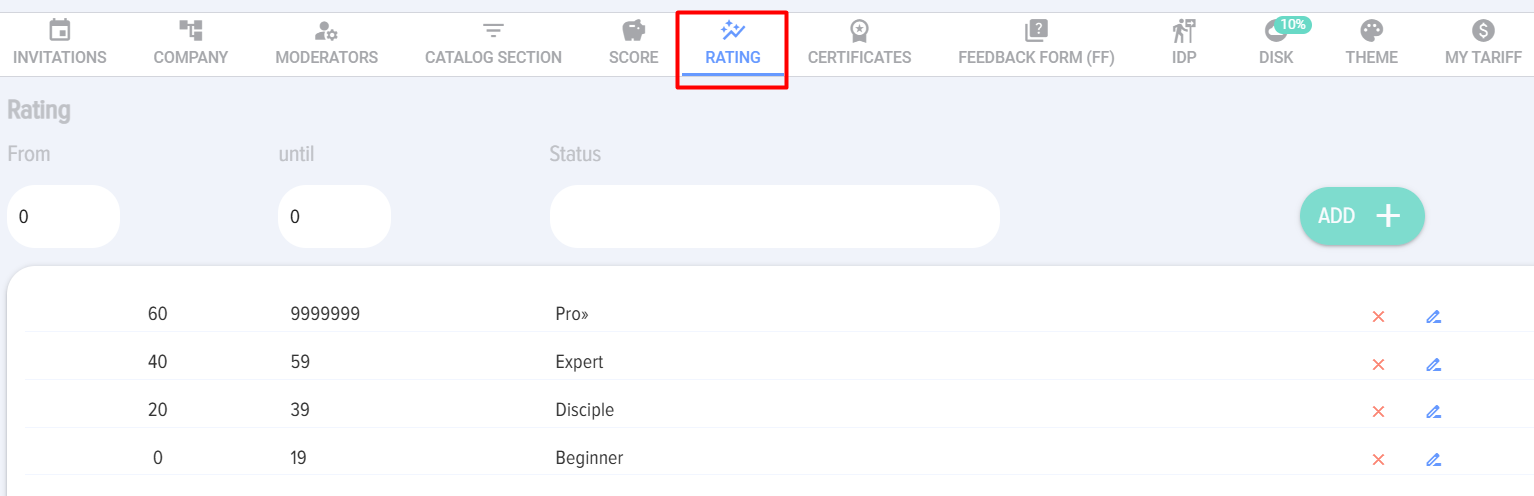
You can add, delete, and edit existing rating levels.
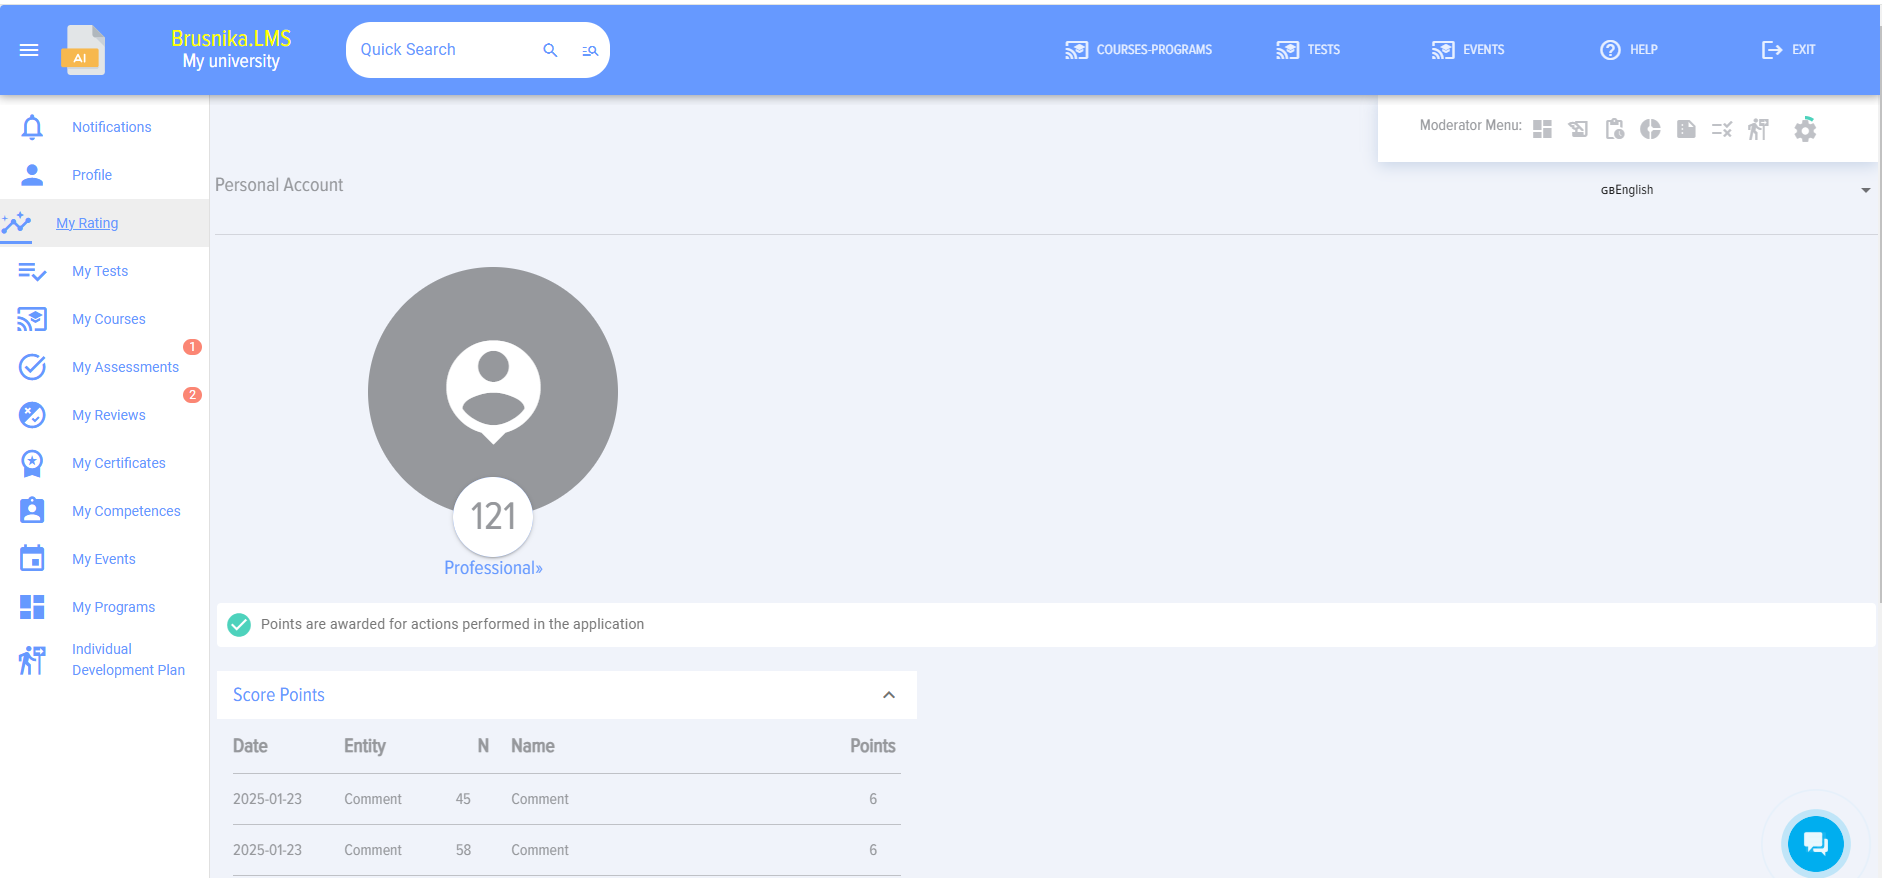
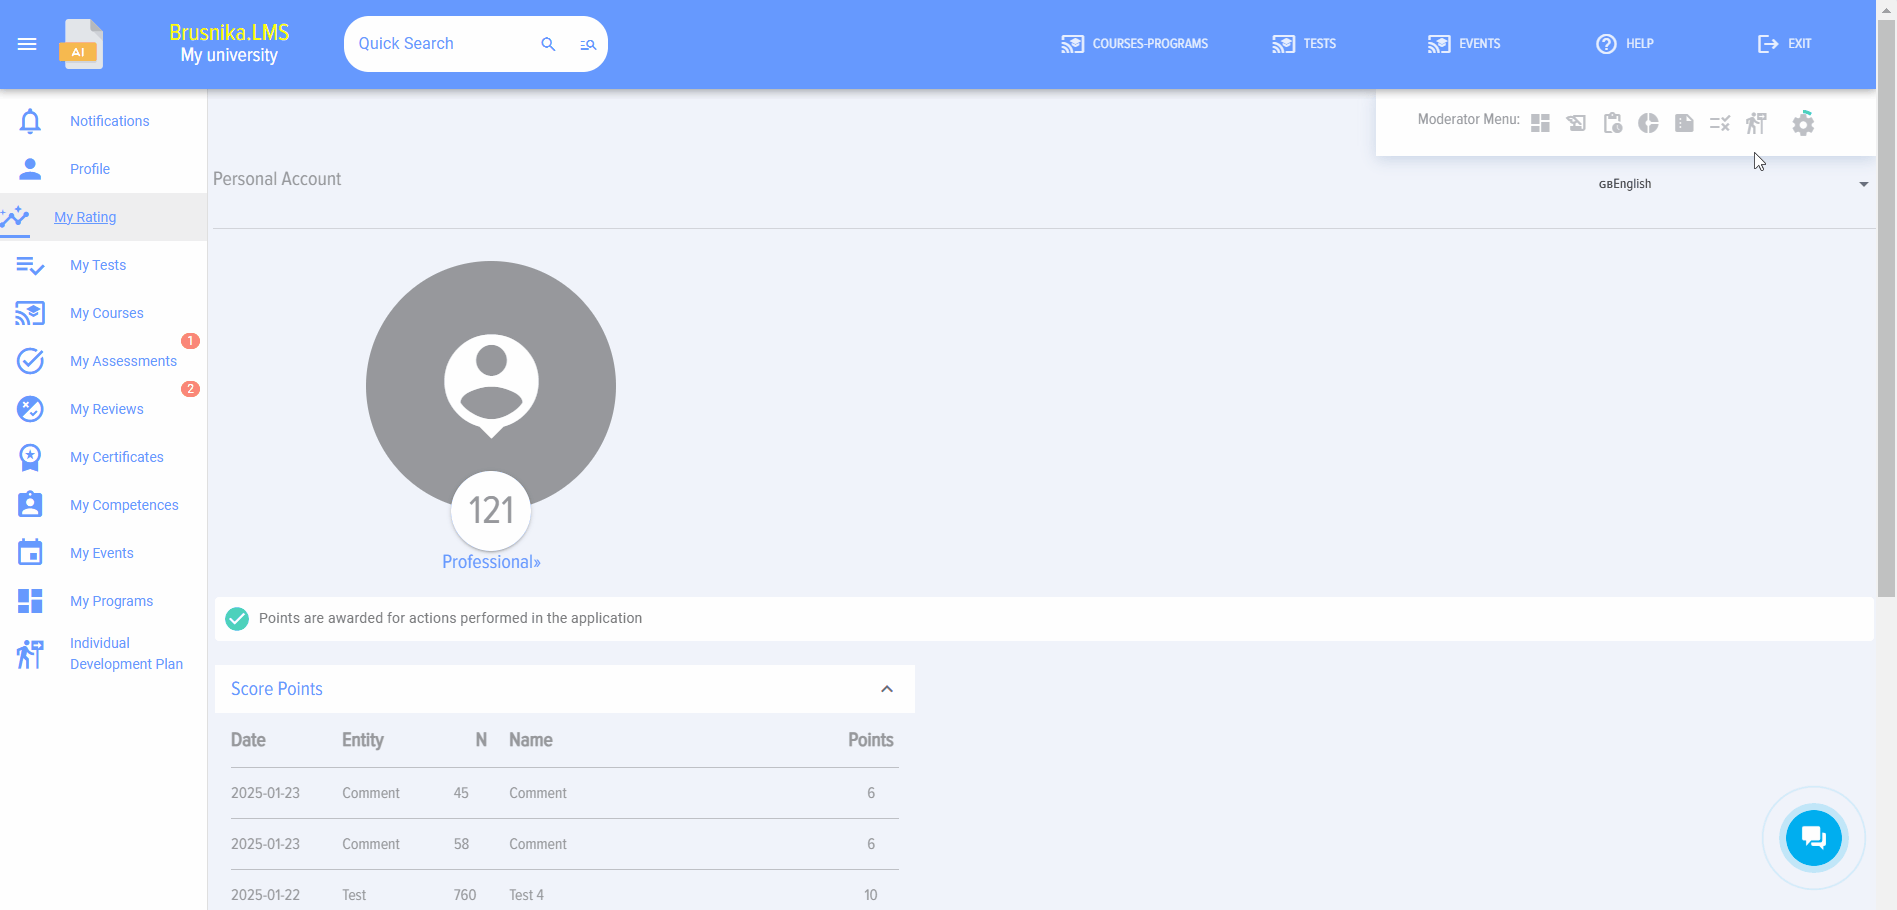
Accumulated scores and rating are displayed in the "My rating" tab of the employee's Personal account:
Feedback form
The application allows creating Feedback Forms (FF) for tests, courses, events, programs, and learning ,material from the knowledge base.
By default, the application already has one Feedback Form (FF) and it is used for all 4 types of events.
An unlimited number of Feedback Forms (FF) can be created. However, at any specific moment, only one Feedback Form (FF) can be active for each type (courses, tests, events, programs).
To add a new Feedback Form (FF), click on the «Add Feedback Form (FF)» element.
To change the name of the Feedback Form (FF), click on «Change name to save», enter the new name, and click «Save».
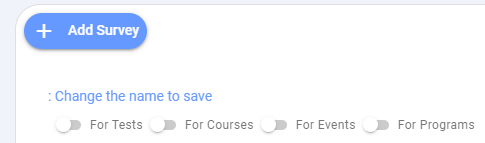

Select for which type of events the Feedback Form (FF) will be used:

Make changes to the questions directly in the fields.

Move questions down or up by grabbing the elements near the numbers with the mouse.

Unnecessary questions can be deleted.

The necessary number of new questions can be added.
Answers are edited in a similar manner.
After developing the Feedback Form (FF), you can preview how it will look to the user.